The best infrared patio heater for most people is a wall- or ceiling-mounted electric shortwave unit in the 1,500 to 3,000W range. It heats people directly (not the air), ignores wind, mounts out of the way, and runs on a standard or dedicated circuit. If you have a covered patio, that setup is hard to beat. If your patio is open and exposed, a freestanding shortwave infrared heater gives you the same wind-resistant warmth with the flexibility to reposition it.
Best Infrared Heater for Patio: Buying Guide and Picks

Willa Brennan
1 May 2026

The right choice comes down to your patio size, whether it's covered, your local climate, and how permanent you want the install to be. This guide walks through all of it so you leave with a specific answer, not just a list. To help you compare options available in the UK market, use this guide to the best infrared patio heater in the UK best infrared patio heater uk.
Why infrared works outdoors (and when it's the right call)
Infrared heaters work on the same principle as the sun and a campfire: they emit thermal radiation that travels through the air without warming it, and that radiation is absorbed directly by solid surfaces like your skin, clothing, and furniture. That's the key difference from a propane convective heater, which warms a bubble of air around you. The moment wind moves through, the warmth from a convective heater disappears. Infrared radiation doesn't care about wind because it's not air-dependent. Bromic Heating describes this as 'heating people, not places,' and it's a genuinely accurate way to think about it. You feel the warmth the second you step into the beam, even if it's breezy.
Infrared heaters also come in three wavelength bands, and those bands matter when you're shopping. Helios Quartz’s technical documentation specifies that its IR emitters operate in the [0. 9 µm (short wave) and 3. 5 µm (medium wave) infrared ranges](https://www.
heliosquartz. com/wp-content/uploads/2024/01/Helios-QuartzIR-HEATERSeng-web. pdf). Short-wave infrared (IR-A, roughly under 1.
5 microns) is the most intense and penetrating option. It's best for open terraces and windy areas where you need maximum output at a distance. Medium-wave infrared (IR-B, roughly 1. 5 to 3 microns) is a bit gentler and works well in semi-sheltered patios.
Long-wave infrared (IR-C, from about 3 microns upward) is softer still, better suited for enclosed or well-insulated spaces like a covered veranda or sunroom. Most of the electric patio heaters you'll find at home improvement stores and online are either short-wave or medium-wave. If you see a heater with a bright glowing element, that's typically short-wave. A softer amber glow or no visible glow usually means medium-wave.
So when is infrared the best choice over propane, natural gas, or other patio heater types? A few situations where it clearly wins: you have a covered patio (no rain on the element), you want zero fumes or open flame, your patio is partially exposed to wind, or you want precise zone control rather than blasting the whole space. Where infrared has genuine trade-offs: the initial cost for a quality electric unit is higher than a basic propane mushroom heater, and shortwave elements emit a strong visible glow that some people find harsh at night. If you want a full comparison of infrared against other fuel types, that's worth reading separately, but for the purposes of this guide, we're staying focused on getting you the right infrared model.
How to size an infrared heater for your patio
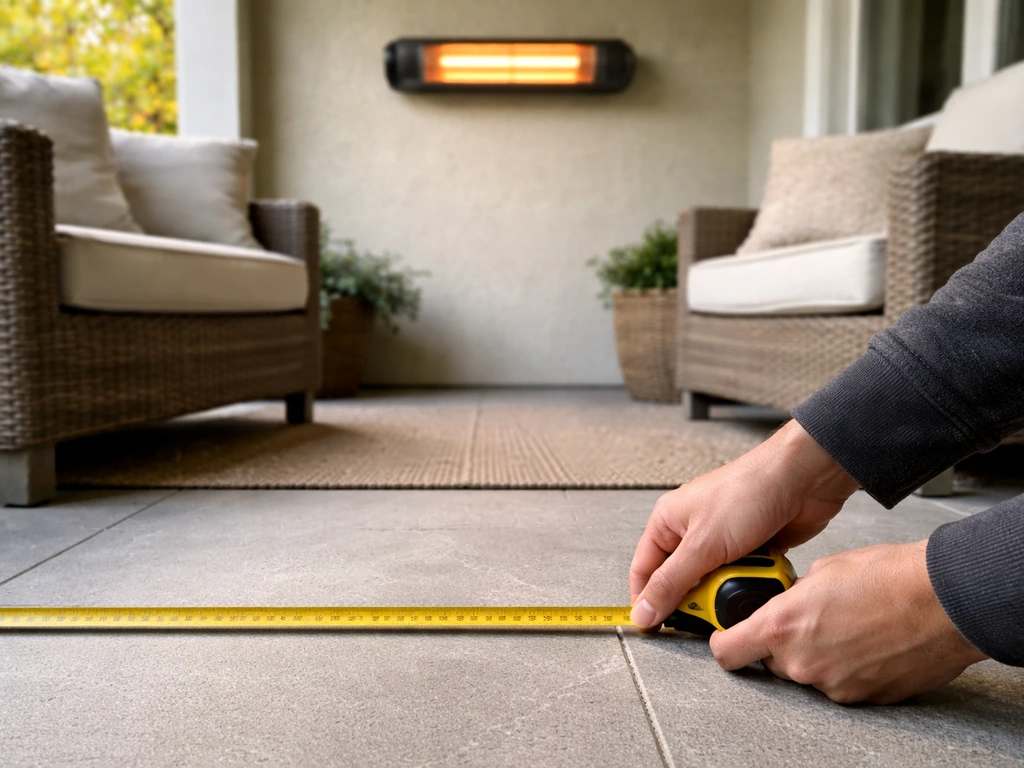
A common rule of thumb is 10 watts per square foot for a covered or sheltered patio, and closer to 15 to 20 watts per square foot for open or windy spaces. A 150 sq ft covered patio needs roughly 1,500W. That same space open to the elements would need 2,250 to 3,000W. These are starting points, not guarantees, because how you feel warmth from an infrared heater is heavily influenced by heater placement, angle, and whether you're sitting or standing in the direct beam.
Here's a practical sizing approach: measure the area where people actually sit, not the total patio dimensions. If your 300 sq ft patio has a 100 sq ft seating zone under a pergola, size the heater for that 100 sq ft zone. One 2,000W wall-mounted unit can cover roughly 100 to 150 sq ft of occupied seating area at moderate cold (around 40°F). For colder climates or larger seating areas, plan for multiple units or a single high-output unit (3,000 to 4,000W).
| Patio Seating Area | Covered / Sheltered | Open / Windy |
|---|---|---|
| Up to 80 sq ft | 1,000–1,500W | 1,500–2,000W |
| 80–150 sq ft | 1,500–2,000W | 2,500–3,000W |
| 150–250 sq ft | 2,000–3,000W | 3,000–4,000W (or 2 units) |
| 250+ sq ft | Multiple units recommended | Multiple units required |
One thing people underestimate: mounting height affects warmth significantly. Most manufacturers rate their heaters at a specific mounting height, often between 7 and 10 feet. If you mount a unit rated for 8 feet at 12 feet, the warmth at body level drops noticeably. Always check the rated coverage area against the stated mounting height, and try to stay within that range.
Key features to compare before you buy
Heat output and coverage area
Wattage is the primary output spec for electric infrared heaters. For gas-powered infrared heaters (like natural gas radiant units), you'll see BTU ratings instead. As a rough conversion, 1,000 BTU/hr equals about 293W. Look for the stated coverage area in the product specs, but treat it skeptically. Many brands state maximum coverage under ideal conditions. A more useful number is what the heater covers at your expected mounting height in real outdoor temperatures.
Controls
Basic models have a simple on/off switch or a pull cord. Mid-range and premium models add a remote control, adjustable power levels (often 3 settings: low, medium, high), a built-in thermostat, or timer functionality. For patio use, a remote control is genuinely useful since you're likely sitting 10 to 15 feet away from a wall-mounted unit. A thermostat is more useful indoors or in very enclosed spaces. On an open patio, you'll usually just dial in a setting and leave it, so a remote with multiple power levels is the most practical upgrade to pay for.
Mounting type
Wall-mounted and ceiling-mounted units are the most space-efficient option for covered patios. They keep the heater out of foot-traffic zones and provide consistent downward or angled warmth to the seating area. Freestanding pole-mount units work better for open patios where you can't mount to a structure, and they're easier to reposition. Tabletop infrared heaters are a third category, great for adding targeted warmth to a specific dining spot without heating the whole area. Each format has a real use case, and the right one depends on your patio layout more than anything else.
Weather and IP rating
IP (Ingress Protection) ratings tell you how well a heater resists dust and water. For an outdoor patio heater, you want at minimum IP44 (splash-proof from any direction) and ideally IP65 (dust-tight and jet-water resistant). For more detail on what an IP65 rating means for dust-tight protection and resistance to water jets, see the IP rating explanation from LED Light Expert IP65 (dust-tight and jet-water resistant). If your patio is fully exposed with no overhead cover, prioritize IP65 or higher. Covered patios can get away with IP44. Do not assume a heater is weatherproof just because it's marketed as 'outdoor.' Check the actual IP rating in the specs.
Safety features
Tip-over protection is a must for freestanding units. Overheat protection (thermal cutoff) is important for all types. For mounted units, check that the housing stays cool to the touch on non-radiating surfaces, especially if kids or pets will be nearby. Some models include a safety mesh or guard over the element for added protection. These aren't flashy features, but skipping them is how people end up with burns or fire hazards on a wooden deck.
Best infrared patio heater picks by patio type and use case
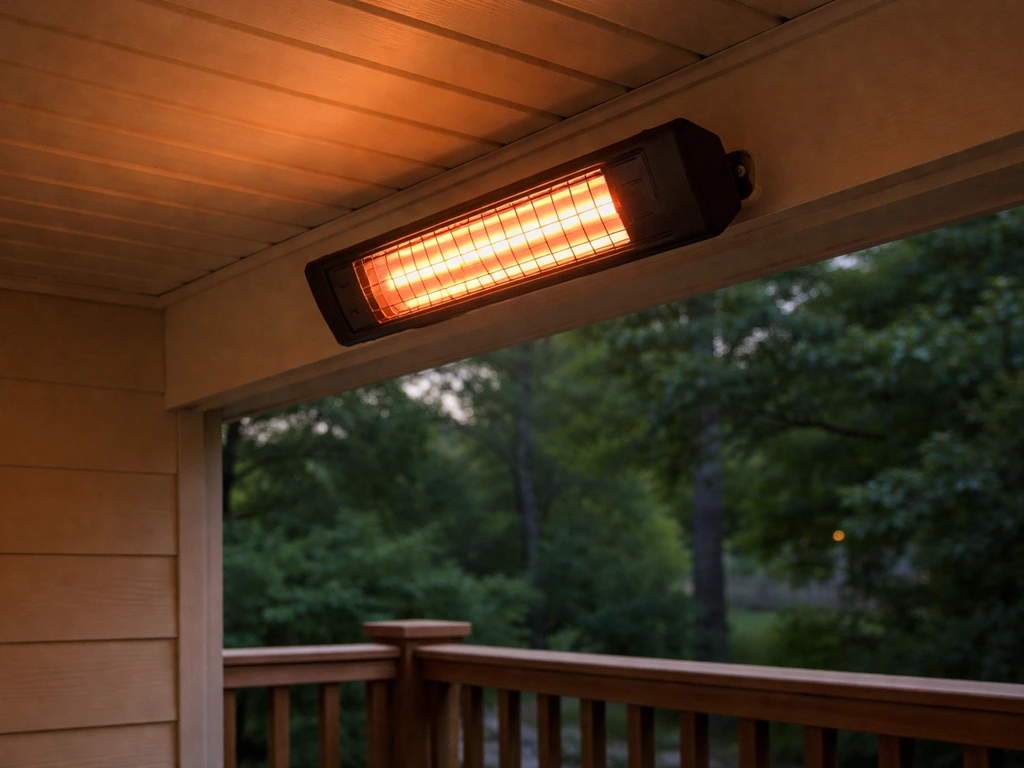
Best overall: wall-mounted electric shortwave, 2,000–3,000W
For most covered or semi-covered patios, a wall-mounted shortwave electric infrared heater in the 2,000 to 3,000W range is the strongest all-around choice. Models in this category typically cover 100 to 200 sq ft at 8 to 10 feet of mounting height, offer remote control and multiple power settings, carry IP65 weather ratings, and run on a standard 240V circuit (or in some cases a 120V 20A circuit for lower-wattage units). Brands like Bromic, Dr. Infrared Heater, and Infratech consistently appear in this category with solid build quality and reliable coverage claims.
Best for small patios (under 100 sq ft): 1,000–1,500W ceiling or wall mount
A balcony, small courtyard, or compact covered porch doesn't need a 3,000W unit, and oversizing means you'll run it on the low setting most of the time anyway. If you’re specifically shopping for the best infrared patio heaters 2021, focus on short-wave output for open areas and medium-wave for covered setups. A 1,000 to 1,500W unit mounted overhead keeps things efficient and comfortable for 2 to 4 people. Look for models with at least two power settings so you can dial back on milder nights. These typically run on a standard 120V 15A household circuit, which means no electrician is required for the install.
Best for open or windy patios: shortwave freestanding or high-output wall mount
Open patios exposed to wind need shortwave infrared specifically, because that wavelength delivers the highest intensity at distance and is least affected by airflow. A freestanding shortwave unit rated at 2,500 to 4,000W positioned close to the seating area (within 8 to 10 feet) delivers noticeably better warmth than a medium-wave unit of the same wattage in breezy conditions. If you can mount to a nearby wall or fence post, a fixed high-output unit gives more consistent coverage than a freestanding model that can catch the wind and shift.
Best for covered patios with a pergola or roof: ceiling-mounted medium-wave
A fully covered patio is where medium-wave infrared shines. The softer warmth is comfortable for extended sitting, the glow is less harsh at night, and the shelter means you don't need maximum intensity to compensate for wind loss. Ceiling-mount units work particularly well here because they spread heat evenly across the seating area below. A 2,000W ceiling unit mounted at 8 feet can comfortably warm 4 to 6 people seated around a dining table. This is also the setup where smart controls (app, timer, thermostat integration) are most practical since the space is more defined.
Best tabletop or zone heater: portable infrared tower or tabletop unit
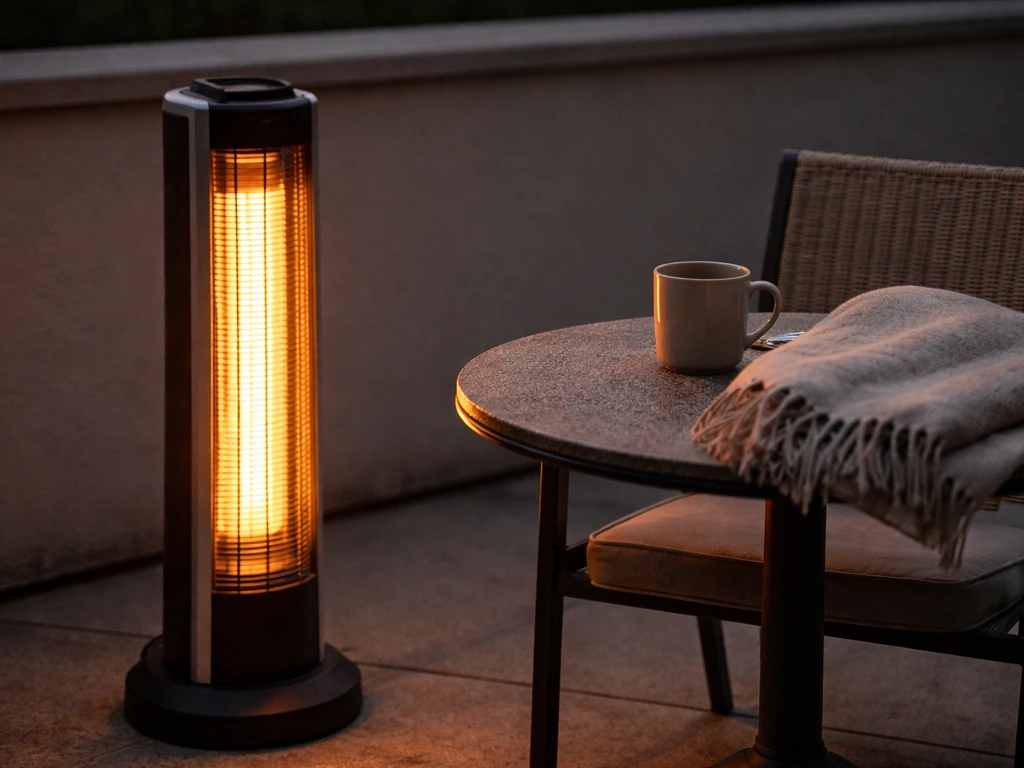
If you want warmth for one table without heating the entire patio, a tabletop or compact tower infrared heater does the job. These run at 750 to 1,500W, plug into standard outlets, and are easy to move. They're not a replacement for a full coverage setup, but they're excellent for a small dinner party, a home bar corner, or adding warmth to a specific spot on a larger patio. The Briza infrared patio heater is a popular model in this segment worth looking at if you want a compact, plug-and-play option.
Best for large commercial or residential patios: multi-unit natural gas or high-wattage electric setup
For patios over 400 sq ft or restaurant-style setups, a single unit won't cut it. Two or more high-output electric units (3,000 to 4,000W each) mounted at regular intervals is the electric route. Alternatively, natural gas infrared radiant heaters offer very high BTU output (30,000 to 50,000 BTU/hr per unit) and can cover large areas more economically if you already have a gas line. The trade-off: gas infrared requires professional installation, proper venting consideration, and isn't available everywhere. Electric infrared scales more easily and is cleaner.
Installation, placement, and setup for real-world heat coverage
Where and how you mount or position your heater matters as much as wattage. Infrared heat travels in a direct beam, so anything that interrupts the line of sight between the heater and the person sitting there also interrupts the warmth. A pillar, a roof support post, a large planter, even the angle of the heater bracket can create cold spots in an otherwise well-powered setup. Before you drill any mounting hardware, stand in your seating area and look directly at the spot where the heater will be. If something blocks your view of it, something is also blocking the heat.
For wall-mounted units, the typical installation sequence is: locate and mark wall studs or use appropriate anchors for the wall material, attach the mounting bracket, run electrical conduit or wire to the installation point (this is where you may need an electrician for 240V units), connect the heater, and adjust the tilt angle. Most brackets allow 30 to 45 degrees of tilt. Angling downward toward the seating area at about 30 degrees from horizontal typically gives the best balance of coverage area and intensity. Straight down (ceiling mount) spreads heat over a wider footprint but reduces intensity at any single point.
For freestanding units, position the heater upwind of the seating area so that any breeze pushes the radiated warmth toward your guests rather than at an angle away from them. Keep the element at roughly head height when seated (around 5 to 6 feet off the ground for seated adults) or elevated slightly above for a downward angle. Never place a freestanding heater directly against a wall, fence, or under a low overhang without checking the clearance requirements in the manual. Most units require at least 3 feet of clearance from combustible surfaces.
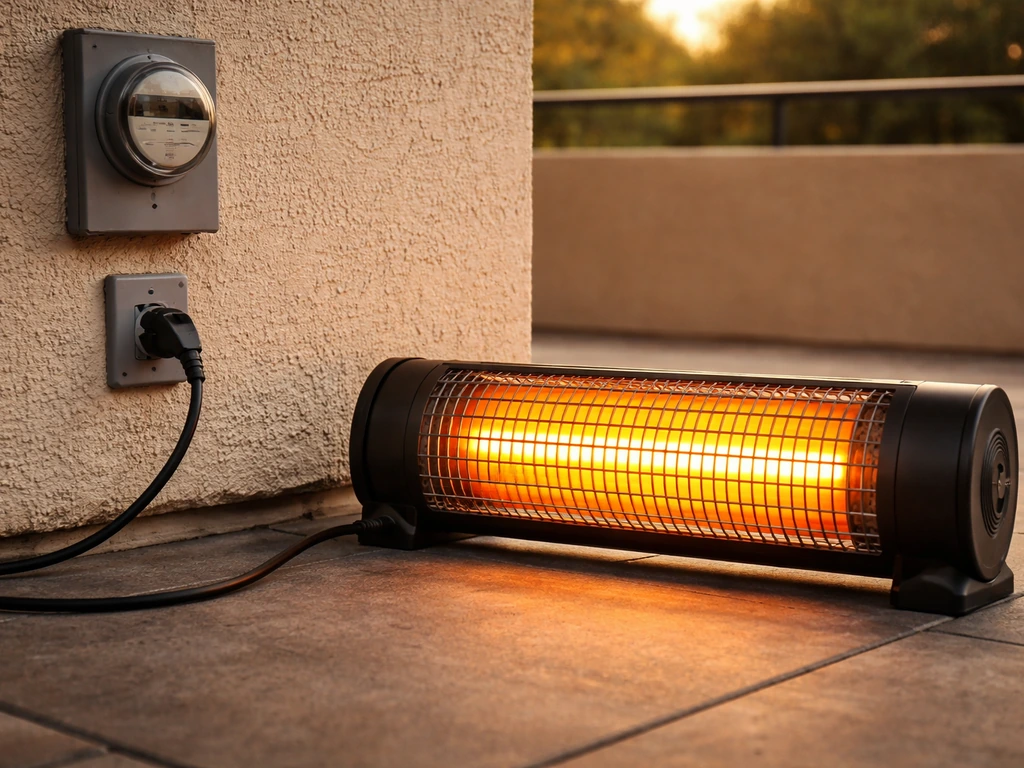
Running costs and power considerations
Electric infrared heaters are straightforward to calculate: watts divided by 1,000 gives you kilowatts, and kilowatts multiplied by your electricity rate gives cost per hour. At the U.S. average rate of roughly $0.16 per kWh in 2026, a 2,000W heater costs about $0.32 per hour to run. A 3,000W unit is $0.48 per hour. Run it 3 hours an evening, 90 evenings a year, and you're looking at $86 to $130 per year in electricity for a typical setup. That's very manageable. If you're running multiple units, the costs stack accordingly.
Power source matters for installation planning. Units up to around 1,500W often run on a standard 120V 15A circuit, which means you can plug them into a regular outdoor-rated outlet. Units in the 2,000 to 4,000W range typically require a 240V dedicated circuit, which means hiring a licensed electrician if you don't already have one in the right location. That electrical work can cost $150 to $400 depending on how far the circuit needs to run. Factor that into your budget alongside the heater price. A $200 heater that needs a $350 circuit install costs you $550 total.
Natural gas infrared heaters have lower ongoing fuel costs in many regions but require professional installation (gas line connection, mounting, potentially a permit). For permanent outdoor kitchen or large entertainment area setups, the math can favor gas over time. For most residential patios, electric is simpler, more flexible, and easier to scale.
| Power Level | Approx. Cost/Hour (at $0.16/kWh) | Circuit Required | Typical Coverage |
|---|---|---|---|
| 1,000W | $0.16 | 120V 15A (standard outlet) | Up to 80 sq ft covered |
| 1,500W | $0.24 | 120V 20A dedicated | Up to 120 sq ft covered |
| 2,000W | $0.32 | 240V dedicated circuit | 100–150 sq ft covered |
| 3,000W | $0.48 | 240V dedicated circuit | 150–200 sq ft covered |
| 4,000W | $0.64 | 240V dedicated circuit | 200–250 sq ft covered |
Buying checklist and mistakes to avoid
Before you pull the trigger on a model, run through this checklist to make sure it's actually right for your space:
- Measure the seating area (not total patio), and use that number to calculate wattage needs (10W/sq ft covered, 15–20W/sq ft open).
- Check the manufacturer's rated mounting height and compare it to your actual installation height. If they don't match, recalculate coverage.
- Confirm the IP rating is appropriate for your exposure (IP44 minimum for covered, IP65 for open or exposed patios).
- Verify the circuit requirements (120V vs 240V) and whether you have an existing outlet in the right location or need new wiring.
- Check that safety features are present: tip-over protection for freestanding units, overheat/thermal cutoff protection for all types.
- Confirm the tilt range of the mounting bracket matches your wall or ceiling configuration.
- Look for remote control or multi-level power settings if convenience matters to you.
- Check minimum clearance requirements from combustible materials (walls, wood ceiling, furniture) in the product manual.
The most common mistakes people make
- Buying too little output: the single most common complaint is that a heater 'doesn't work.' Usually it's an undersized unit for the space, not a defective product. When in doubt, size up.
- Ignoring mounting height: a heater rated for 8-foot ceiling coverage loses significant intensity mounted at 12 feet. Always match the install height to the spec.
- Choosing medium-wave for a windy open patio: medium-wave is great indoors or in covered spaces, but for exposed outdoor areas, shortwave is the right wavelength.
- Blocking the line of sight: infrared travels in a beam. Obstacles between the heater and the seating area create cold spots regardless of how powerful the heater is.
- Not accounting for installation costs: a 240V circuit isn't free. Budget for electrical work alongside the heater purchase price.
- Skipping the IP rating check: an indoor or 'partially outdoor' rated heater used in rain exposure will fail early and can be a safety risk.
- Buying the cheapest tabletop unit expecting it to heat a large patio: tabletop and portable units are zone heaters, not whole-patio solutions.
If you're still narrowing down specific models after working through this guide, it's worth looking at detailed reviews of individual infrared heaters to see real-world performance data alongside spec comparisons. For quick comparison, many buyers also rely on radiant patio heater reviews to spot the best choices for different patio setups detailed reviews of individual infrared heaters. To help you choose quickly, these patio infrared heater reviews compare popular models for output, coverage, and night-time brightness.
Electric infrared options have the widest selection and lowest barrier to install, making them the right starting point for most homeowners. Get the sizing right, confirm your power setup, check the IP rating, and you'll have a patio that's genuinely usable well into fall and even through mild winter evenings.
FAQ
Can I leave an infrared patio heater outside year-round, even in heavy rain?
Yes, but only if the heater’s IP rating and your mounting location match your exposure. For fully exposed patios, look for IP65 (or higher) and confirm the manufacturer allows installation near rain and wind-driven splash. If you have a covered eave, IP44 can be acceptable, but avoid “outdoor” marketing claims that don’t list an actual IP number.
Why do I feel warmth at first, but other people across the table feel almost nothing?
If you feel heat right away, that usually means you are in the beam path. With infrared, the heater does not warm “the space,” so coverage depends on line of sight and angle. Place the heater so seated guests can see the element (no pillars, planters, or furniture blocking the view), then fine-tune tilt so the beam lands on the seating zone rather than the floor.
Does heater wattage still matter if the heater is mounted above the recommended height?
Not necessarily. A heater can be correctly sized by wattage but still feel weak if mounted too high or aimed poorly. Check the rated mounting height and the stated coverage area at that height, then test with a quick real-world check (stand and sit where people will be, with wind and typical evening conditions). If the beam misses body level, you will notice a big drop.
When should I choose multiple smaller infrared heaters instead of one larger unit?
For infrared, you generally do not need multiple heaters for large patio width if you can place one high-output unit to cover the main seating line of sight. However, you often do need multiple units when you have multiple separated seating zones, many people spread out beyond one beam footprint, or you are trying to avoid blockers (posts, railings). A practical decision aid is whether one heater can “see” all seated areas from roughly 8 to 10 feet away.
Will a short-wave infrared heater be too bright for evening use?
Yes, short-wave can be very bright at night. If night comfort matters, prioritize medium-wave for covered patios or choose a model with a less intense visible glow and a diffuser or shield. Also consider angling the heater so the bright element is not directly in guests’ eye line.
How do I know whether I need 120V plug-in power or a 240V dedicated circuit?
Look for the heater’s power draw and whether it needs a 240V dedicated circuit. A rule of thumb is that around 1,500W or lower may run on a standard 120V outdoor circuit, while 2,000W to 4,000W often requires 240V. Do not rely on website wattage alone, confirm voltage requirements and outlet type (outdoor rated, protected) before you buy.
Should I buy a model with a built-in thermostat or is a remote enough?
Use thermostat only when you have a defined, enclosed-ish zone. On open patios with moving air, thermostats can cycle unexpectedly because the heater may not “sense” people as effectively as the beam delivers heat to individuals. In open windy spaces, remote control with fixed low, medium, high levels is usually more practical.
What safety features are non-negotiable for patios with kids or pets?
No. Infrared can still be unsafe if the casing gets too hot, if the element has no guard, or if clearance rules are ignored. For freestanding units, confirm tip-over protection exists, for all units confirm thermal cutoff is present, and verify required clearance from combustible surfaces like wooden decking and furniture.
If I have an open, windy patio, what placement changes matter most for better warmth?
Wind changes the experience differently by wavelength, but it does not eliminate placement issues. Even short-wave performance drops if the beam is blocked or aimed away. If you are in a breezy open terrace, position the freestanding unit upwind relative to the seating and keep it within the manufacturer’s effective distance, then re-evaluate if you see large cold spots near the edges.
Why do coverage claims from different brands not match my results in real life?
Often, a “coverage area” claim is optimistic and assumes ideal conditions. Use it as a rough starting point, then adjust for your seating distance, mounting height, and how cold it typically gets. If your patio is frequently used in shoulder-season temperatures, plan for more output or additional units rather than assuming the maximum rating will hold every night.