The FlamePro pellet patio heater is a solid pick if you want genuine wood-fire ambiance and real heat output on a budget, but it comes with real trade-offs: manual ignition, a 4-hour burn window per hopper load, and ongoing ash management that propane and electric heaters simply don't require. If you're okay with that upkeep, it delivers 75,000 BTUs across roughly 120 square feet and can be found at Costco for well under $150 (sometimes dramatically less on clearance). If you want push-button convenience or worry-free operation in a covered space, a propane or electric unit is a better fit. Read on for the full breakdown.
FlamePro Pellet Patio Heater Review and Setup Guide

Willa Brennan
20 May 2026
First, let's sort out which FlamePro model you're actually looking at
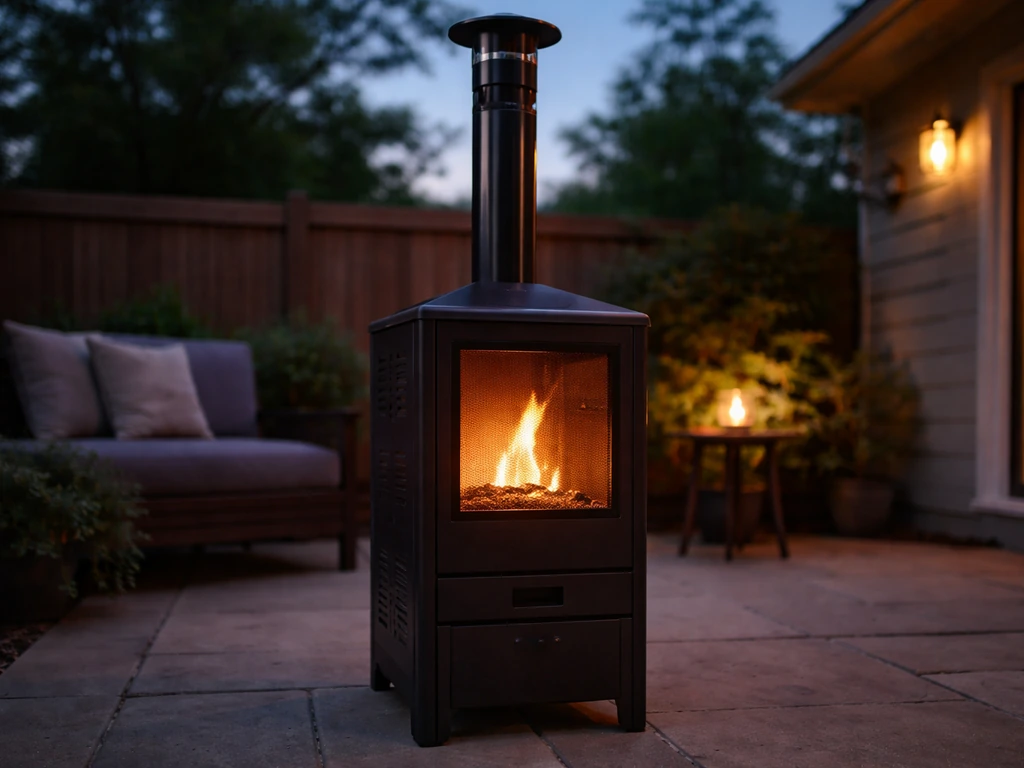
FlamePro sells more than one outdoor heater, and the naming is just vague enough to cause confusion. The model this review focuses on is the FlamePro 81-inch Steel Patio Pellet Heater (Costco Item 1713430, Model 14365). It's a tall tower-style pellet burner: 80.7 inches high, 73.5 lbs, with a reflector dish at the top that directs heat downward. It runs on standard wood pellets, not propane or electricity.
FlamePro also makes a tabletop patio heater (Costco Item 1807351), which is a completely different product at a much smaller scale. If you searched 'FlamePro tabletop patio heater' or 'flame patio heater review' and landed here, those tabletop and tabletop pellet variants are covered elsewhere on this site. This article is specifically about the tall freestanding pellet heater. Make sure you're looking at the right one before you buy, because the form factor, fuel type, and use case are quite different.
Build, design, controls, and ease of use
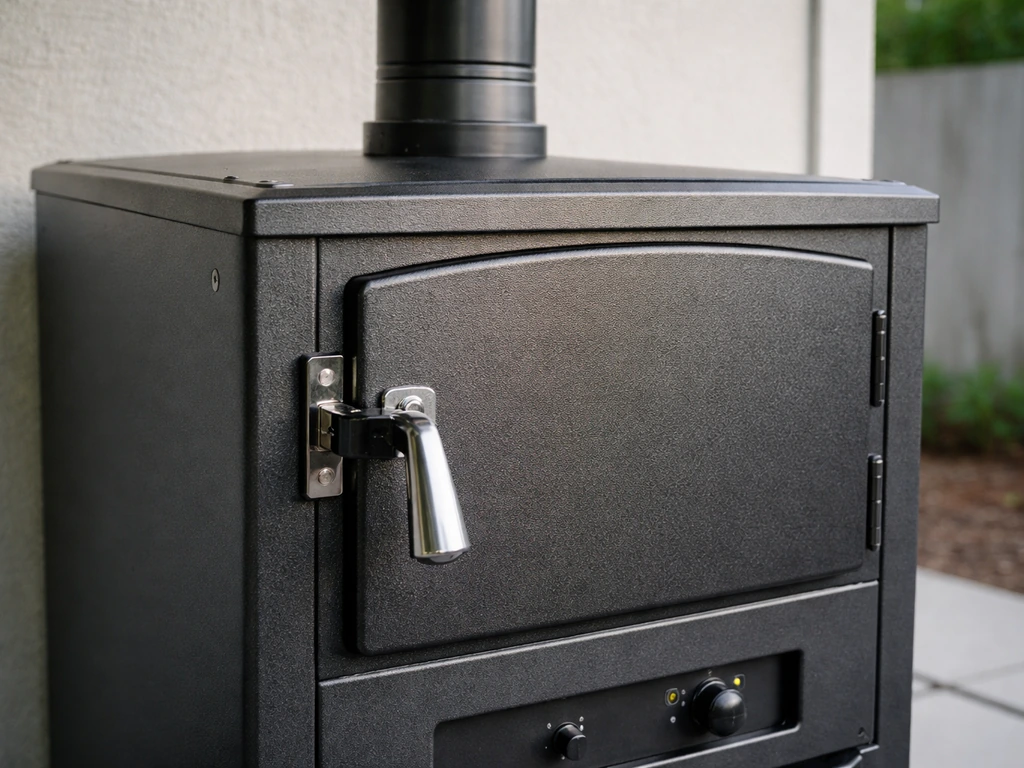
The FlamePro 81-inch pellet heater is built from steel with a high-temperature powder-coat finish. It has a proper chimney stack, a front-access door with a handle and latch, a firebox/firepot where combustion happens, and a reflector dish mounted at the top of the chimney. At the bottom there's a removable ash tray and dual wheels for moving it around your patio without lifting the full 73.5 lbs. A PVC cover is included for storage after use.
The control system is about as simple as it gets: there are no electronic controls, no thermostat, no remote. You load pellets, use lighter fluid to get things started, and light with a match or butane lighter. That's it. Airflow is managed by keeping the door closed during operation. The manual makes this clear: leaving the door open lets wind short-circuit the combustion process and the heater won't burn properly. There's a shutoff gate that controls whether pellets fall from the hopper into the fire pot. Beyond that, the only 'control' is how full you load the hopper.
One honest heads-up on design: this heater is heavy and relatively tall, and the manual explicitly warns it can tip in strong winds. The wheels help with repositioning but don't anchor it. On a breezy patio, you'll want to think about placement carefully. The door handle also gets hot during operation, so the manual reminds you to use caution when opening it mid-session to stir pellets.
Heating performance and what spaces it actually works for
The rated output is 75,000 BTUs, and the reflector dish is designed to aim that heat downward over roughly 120 square feet. To put that in practical terms, 120 square feet is about a 10x12 seating area, which is a medium-sized patio table with chairs around it. The heat is directional because of the reflector, so placement matters: you want people sitting underneath the dish, not off to the side.
For uncovered patios, wind is the real variable. Wood pellet heaters are more sensitive to wind than propane mushroom-top heaters because the combustion is less protected. On calm nights, the FlamePro works well outdoors. On windy nights, you may get uneven combustion and reduced effective heat. A partially covered space, like a pergola or a roofed patio corner, is actually the ideal setting: it shields the chimney draft while still giving enough ventilation to keep combustion safe.
The 18-lb hopper burns for up to 4 hours. In practice that's a solid evening session, but if you're hosting a longer event you'll need to reload. One bag of standard wood stove pellets (typically sold in 40-lb bags) gives you roughly two full loads. The manual specifically recommends softwood or wood pellet stove pellets for better heat output and combustion efficiency. It warns that BBQ and food-grade pellets have lower heat output, so stick to stove-grade pellets to get anywhere near that 75,000 BTU figure.
Setup and operation: a walkthrough that covers what the manual actually tells you
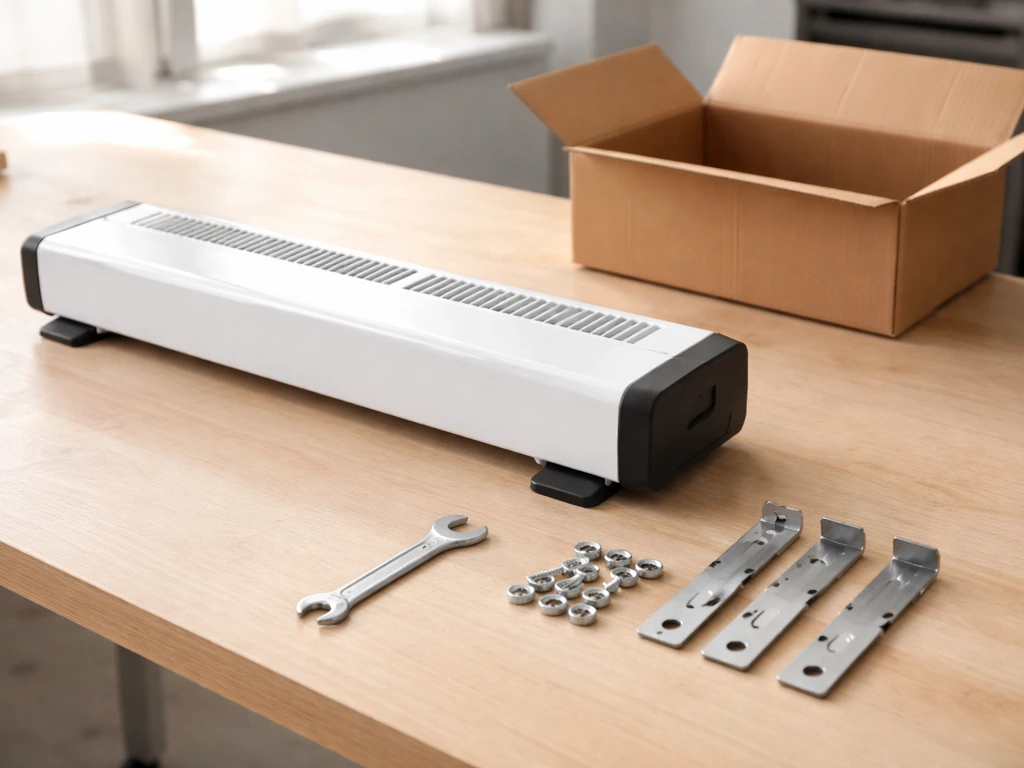
Assembly
Assembly is required, and the box includes a wrench. You'll need a Phillips screwdriver that is not included, so grab one before you start. The assembly sequence from the manual goes like this: install the door handle with the lock nut and latch, attach the heater body to the base, screw the legs into the bottom base, place the grate and firepot, install the ash tray, attach the reflector to the chimney top, assemble the chimney sections, and then attach the full chimney assembly to the heater body. It's not a quick 10-minute job, but it's straightforward if you follow the steps in order and don't skip ahead.
First burn: expect smoke for about 15 minutes
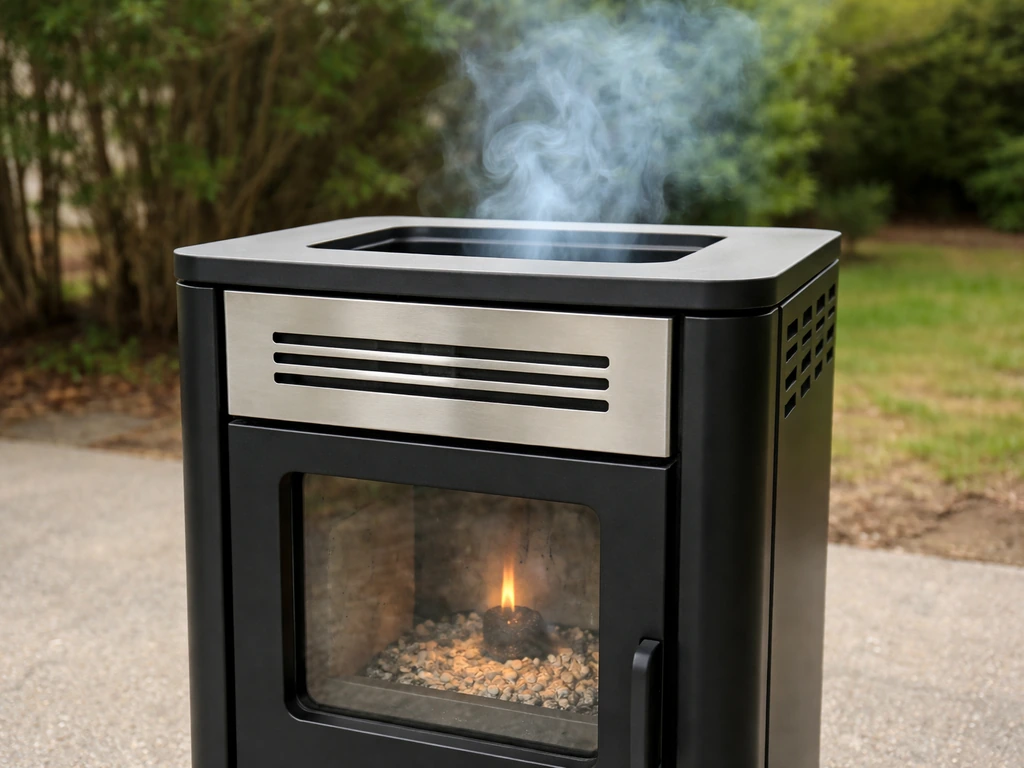
The powder-coat finish on the steel body needs to cure on the first use, and this produces noticeable smoke for approximately the first 15 minutes of operation. The manual explicitly says this is normal and temporary. Don't panic, don't call it defective: just make sure you're outdoors with good airflow and let it burn through. After that first session, subsequent burns are much cleaner.
Loading pellets and lighting the heater
- Confirm the heater is fully assembled and sitting on a stable, level surface.
- Push the shutoff gate closed so pellets won't fall into the fire pot while you load.
- Fill the hopper with wood stove pellets up to the safe maximum of 18 lbs (approximately 8.2 kg). Do not overfill.
- Open the front door and pull the shutoff gate fully open so pellets drop down into the fire pot.
- Spray a small amount of lighter oil or lighter gel onto the pellets in the fire pot.
- Ignite with a butane lighter or match.
- Close the front door and keep it closed during operation.
That's the full ignition sequence. The manual is clear that you should only use lighter oil or gel for starting, not gasoline or kerosene. For re-ignition if the fire goes out, use only a match or lighter directly on the pellets. Never add flammable accelerants to a heater that may have residual heat inside.
During operation
Keep the door closed. After a couple of hours, pellets can pile up unevenly at the bottom of the fire pot and combustion efficiency drops. The fix is to open the door carefully (the handle is hot, so use a cloth or glove), stir the pellets with the included fire poker to level them out, and close the door again. This is normal pellet behavior and a routine part of using this type of heater.
Maintenance, cleaning, and winter storage
Pellet heaters require more active maintenance than propane or electric options. Here's what the manual and practical use require on a regular basis.
After each use
- Let the heater cool completely before touching any internal components.
- Remove the ash tray and dispose of ash in a noncombustible metal container. Even cooled ash can retain heat, so let it sit before discarding in the trash.
- Wipe soot from the glass viewing panel with a soft cotton cloth, mild soap, and water once the body is fully cool. This keeps the flame visible and looks better.
- Clean the exterior surfaces with neutral soap and water as needed.
Periodic and seasonal maintenance
The manual flags creosote buildup as a real concern. Residue accumulates in the chimney and inside the heater body over multiple sessions. For heavy use, the manual says to consult a professional for cleaning before continuing safe operation. At minimum, inspect the chimney interior at the start and end of each season. Leaving a clogged chimney unaddressed is a fire risk.
Before storing for winter or any extended period, remove all remaining pellets from the hopper. Pellets left inside can absorb moisture, swell, and jam the gravity-fed system. Store the heater in a cool, dry place and use the included PVC cover to protect it from the elements. Avoid letting moisture reach any part of the interior.
Safety checklist and troubleshooting common problems
Before every use: safety checklist
- Use outdoors only. The heater produces carbon monoxide, which is odorless and can be fatal. Never use in a tent, car, camper, or enclosed porch.
- Keep all combustibles at least 4 feet away from all sides of the heater and from the top.
- Check for wind conditions. Position the heater where it won't tip, and don't use in high-wind situations.
- Inspect the chimney and ash tray for buildup before lighting.
- Never exceed the 18-lb maximum pellet capacity.
- Use only wood stove pellets, not food or BBQ pellets, not charcoal, not gasoline or any other fuel.
Troubleshooting: the most common issues
| Problem | Likely cause | Fix |
|---|---|---|
| Heater won't light | Pellets not in fire pot / shutoff gate not open | Pull the shutoff gate fully open and confirm pellets have dropped into the fire pot before lighting |
| Heater won't light | Not enough lighter fluid on pellets | Add a small amount of lighter gel or oil directly to pellets, then re-ignite with match or lighter |
| Poor heat output / weak burn | Door left open | Close the door. Open door causes wind bypass and prevents proper combustion |
| Poor heat output / weak burn | Using BBQ or food pellets | Switch to softwood or wood stove pellets for better combustion and heat output |
| Excessive smoke during first use | Powder-coat curing | Normal for the first ~15 minutes. Keep outdoors and let it run through |
| Excessive smoke after first use | Creosote or chimney blockage | Let heater cool, inspect chimney, and clean or consult a professional before next use |
| Pellets not feeding into fire pot | Moisture-swollen pellets jamming hopper | Empty the hopper, remove any jammed pellets, dry the interior, and reload with fresh dry pellets |
| Heater won't re-light mid-session | Pellets piled up and smothered | Open door carefully, stir pellets with the fire poker, and re-ignite with a match or lighter only |
| Heater tips or is unstable | Wind or uneven surface | Reposition to a sheltered, flat area. Do not use in high wind conditions |
One thing worth noting: if you can't find the physical manual, the official manual (Model 14365, Item 1713430) is available as a PDF linked from the Costco Japan product page. It's the same product and the manual covers assembly, ignition, safety, and maintenance in detail.
FlamePro pellet vs. propane, electric, and natural gas: which actually fits your situation?
Pellet heaters occupy a specific niche, and the FlamePro is a good example of both the appeal and the limitations of that niche. Here's how it honestly stacks up against the alternatives.
| Feature | FlamePro Pellet (81") | Propane (e.g., 46,000 BTU mushroom top) | Electric (infrared) | Natural Gas (permanent) |
|---|---|---|---|---|
| Heat output | 75,000 BTU | 40,000–46,000 BTU typical | 1,500–5,000W (~5,000–17,000 BTU) | 40,000–50,000 BTU typical |
| Coverage area | ~120 sq ft | ~100 sq ft | ~50–100 sq ft | ~100–125 sq ft |
| Ignition | Manual (lighter fluid + match) | Push-button or piezo | On/off switch | Electronic or manual |
| Fuel management | Load pellets, stir during use, clean ash | Swap propane tank | Plug in | None (permanent line) |
| Portability | Moderate (wheels, 73.5 lbs) | Good (tank-and-heater portable) | Good (lightweight) | None (fixed) |
| Ambiance/flame | Real wood fire, visible flames | Flame visible through guard | No visible flame | Flame visible through guard |
| Covered space safe? | Partially covered OK, never enclosed | Outdoors only / partially covered | Yes, indoor-rated models available | Outdoors only / partially covered |
| Ongoing cost | Wood pellets (~$6–9 per 40 lb bag) | Propane (~$20–25 per 20 lb tank) | Electricity (low per hour) | Natural gas (low and stable) |
| Maintenance level | High (ash, creosote, chimney) | Low (occasional cleaning) | Very low | Low |
If you want genuine fire ambiance, the highest BTU output in this price category, and you don't mind the upkeep, the FlamePro pellet heater is hard to beat at its Costco price point. Real-world pricing has ranged from under $50 on clearance to roughly $150 at regular sale pricing, which makes the 75,000 BTU output remarkably cost-effective per dollar of purchase price.
If you want no-hassle operation, a propane heater is the better call. Models in the propane category (including options like the Fire Sense Performance Series LPG heaters, which we cover separately) offer push-button ignition, consistent output regardless of pellet quality, and no ash cleanup. If you're comparing it to a Performance Series LPG patio heater, you'll usually find the biggest differences are ignition style, maintenance, and wind sensitivity Performance Series LPG heaters. If you want to explore the Fire Sense Performance Series LPG patio heater angle instead, it has different fuel, ignition, and maintenance trade-offs than pellet models Fire Sense Performance Series LPG heaters. They're the right choice for people who want to flip a switch and forget about it.
Electric infrared heaters are the pick for covered patios, screened porches, or anyone who can't use open flame or combustion fuels in their space. They're quieter, cleaner, and completely maintenance-free. The trade-off is lower BTU output and no ambiance.
Natural gas is the right answer if you want permanent, high-output heat on a large open patio and you're willing to run a gas line. The ongoing fuel cost is the lowest of any option, but the upfront installation cost is real.
My honest recommendation: who should buy the FlamePro pellet heater (and who shouldn't)
Buy it if:
- You want real wood-fire ambiance with visible flames and the smell of a wood fire.
- Your patio is roughly 120 square feet or smaller, ideally partially covered or sheltered from wind.
- You're comfortable with a simple manual ignition process and a bit of hands-on maintenance.
- You're buying at Costco pricing (especially on clearance) and want the most BTUs per dollar.
- You'll use stove-grade wood pellets and keep a supply on hand.
Skip it if:
- You want push-button convenience and zero maintenance between uses.
- Your patio is consistently windy and you have no shelter to place the heater.
- You need to heat a covered or semi-enclosed space safely (CO risk is real with any combustion heater).
- You host long events and don't want to reload fuel partway through the night.
- You have a screened porch, sunroom, or any space where smoke would be a problem.
Before you buy: verify these things
- Check whether your local Costco has it in stock or on clearance. Pricing varies significantly by location and season.
- Confirm you have a source for wood stove pellets locally (not BBQ pellets). Most hardware stores carry them in 40-lb bags.
- Measure your patio space. If you're trying to heat more than 120 square feet, consider a propane option with multiple units or a natural gas heater.
- Think about wind exposure. If your patio is exposed, identify a sheltered corner before purchasing.
- Have a plan for off-season storage: a dry, covered area and a way to fully empty the hopper.
The FlamePro 81-inch pellet patio heater is a genuinely good value for the right person. It punches above its weight on BTU output for the price, looks great on a patio, and the included accessories (fire poker, ash tray, PVC cover, wheels) show some real thought went into the practical ownership experience. If you are looking for a quick FlamePro pellet patio heater review verdict, this model stands out most when you want real wood-fire ambiance and can handle regular ash and chimney maintenance FlamePro pellet heater. Just go in with clear eyes about the upkeep involved, and make sure your space and habits are a match for what a pellet heater actually demands. GHP Group, Inc. lists the FlamePro brand heater warranty as a one-year warranty against manufacturing defects in workmanship or materials.
FAQ
Is the FlamePro 81-inch flamepro pellet patio heater review model safe for a covered patio or under a pergola?
It can work well under partial cover, but only if there is enough ventilation for combustion gases to escape and you can avoid wind gusts that disrupt draft. If your space is fully enclosed, a pellet heater is usually a bad fit because smoke and soot buildup risks rise when the chimney cannot pull properly.
How many bags of pellets do I need for a full weekend of use?
Because the hopper is rated for about 4 hours on an 18-lb load, plan for multiple refills. A typical 40-lb bag covers about two full hopper loads, so two to three bags usually covers roughly 8 to 12 hours of burn time, depending on wind and how long you keep the door shut.
What kind of pellet should I buy if I want to hit the 75,000 BTU figure?
Use stove-grade wood pellets intended for wood stoves or pellet stoves. BBQ or food-grade pellets can produce less heat, so even if the heater ignites, you may not see the same warm-up and output performance.
Why does my pellet flame seem weak or uneven, and what should I check first?
Most often it is airflow, fuel quality, or wind. Confirm the door stays closed during operation, check that pellets are level in the fire pot after a couple hours, and use stove-grade pellets. Strong winds can also cause incomplete combustion, even with a closed door.
Do I really need to stir pellets mid-session, or can I just let it burn?
For best efficiency, plan to stir if pellets start to pile unevenly in the fire pot, typically after a couple hours. While not every burn will require it immediately, waiting too long can reduce combustion and waste heat.
What should I do if the fire goes out during use?
Do not add any flammable accelerants. Let it cool enough to handle safely, then re-ignite using a match or lighter directly on the pellets, and make sure the door is closed so combustion air can stabilize.
How often should I clean the chimney and inspect for creosote buildup?
The manual flags creosote as a real concern. At minimum, inspect the chimney interior at the start and end of each season, and if you use it heavily, consider professional cleaning for continued safe operation. If you notice excessive soot or draft issues, clean sooner.
Can I store pellets in the hopper between seasons?
No, remove remaining pellets before winter or any extended storage. Pellets can absorb moisture, swell, and jam the gravity-fed system, which leads to ignition and feed problems next time.
Does the powder-coat smoke in the first burn ever indicate a problem?
A noticeable amount of smoke for roughly the first 15 minutes is normal as the coating cures. If smoke keeps heavy beyond that, or you smell burning plastic or wiring, stop using the unit and verify assembly, chimney fit, and that you are not using incorrect fuels.
How do I prevent the heater from tipping in wind?
Wind is a known tipping risk for tall models, and wheels do not anchor the heater. Choose a sheltered location, avoid placements where gusts hit the chimney directly, and keep it away from areas where people or furniture bump it. If you regularly have strong gusts, a pellet tower heater may be the wrong choice.
What is the safest way to open the door to check or stir pellets?
Open the door carefully and use protection because the handle can get hot during operation. Keep the door open only as long as necessary, stir to level the pellets, then close it promptly to restore proper airflow.
Will I need any extra tools beyond what the box includes?
You will likely need a Phillips screwdriver that is not included. Also, plan for assembly time and do not skip steps in the manual sequence, especially chimney section assembly and attachment, since fit and alignment affect draft.