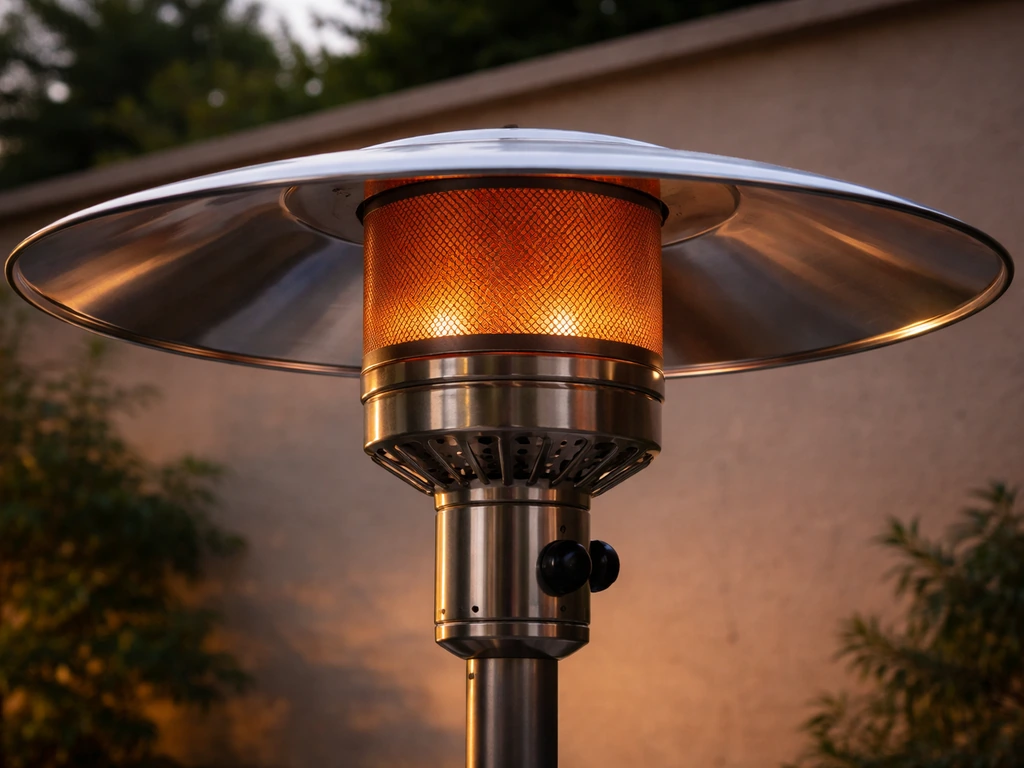
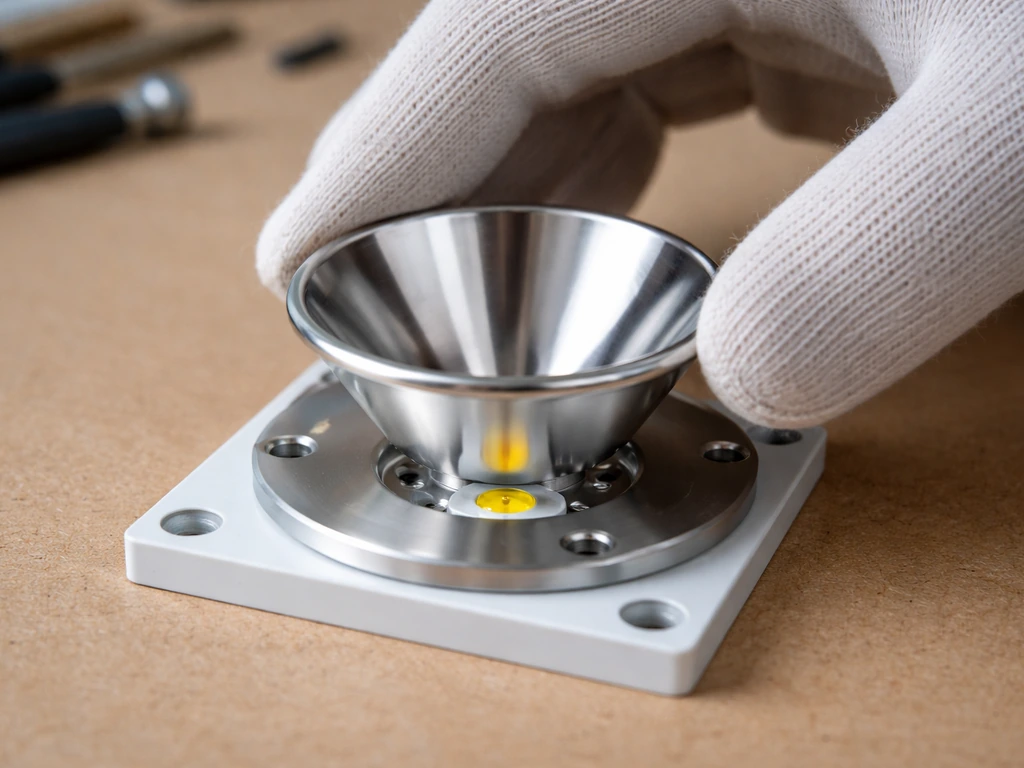
The top reflector shield on a patio heater is the inverted cone or dome-shaped piece mounted above the burner head. Its whole job is to catch radiant heat that would otherwise escape straight up into the sky and redirect it outward and downward toward the people sitting around the heater. When it's working correctly, you barely notice it. When it's damaged, dirty, or missing, you'll feel it immediately: weak heat output, uneven warmth on one side, or a heater that seems to run fine but just doesn't warm the patio the way it used to.
Patio Heater Top Reflector Shield Guide: Identify, Fit

Willa Brennan
21 May 2026
What the top reflector shield actually does
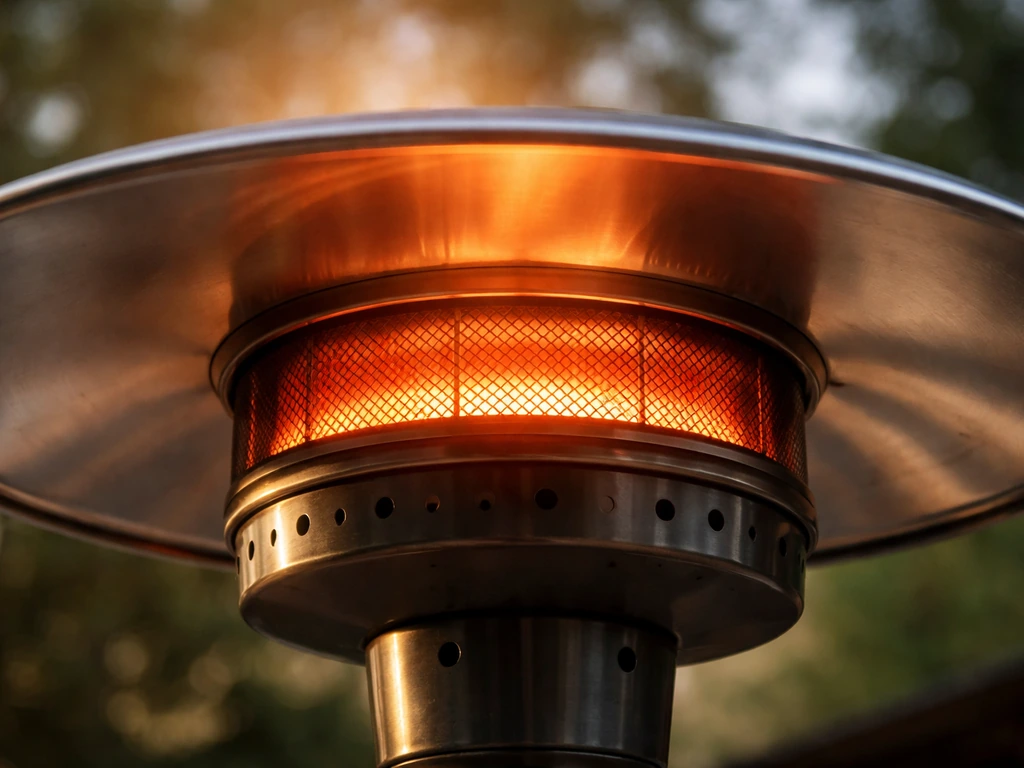
Radiant patio heaters (the tall mushroom-shaped propane ones are the most familiar example) generate infrared heat from a burner and emitter screen. Without something to redirect it, a significant portion of that heat goes straight up and is wasted. The reflector shield captures it and bounces it down and outward into the coverage zone, which is typically a circle of 8 to 15 feet depending on the heater's BTU output.
That's not just an efficiency story, the reflector also acts as a wind buffer for the burner below, helping maintain a consistent flame and even heat across the emitter screen. A dented, corroded, or improperly seated reflector scatters heat instead of focusing it, and you end up with cold spots, weak output, or one side of the patio noticeably warmer than the other.
Electric patio heaters use the same concept. Many infrared electric units list a "heat reflector" as a dedicated part in their diagrams, and some umbrella-style electric heaters include a concentrating reflector as a core spec. The geometry of that reflector, its angle, depth, and surface quality, directly shapes where the heat goes. It's not a decorative cap. It's a functional heat-directing component.
How to tell which reflector your heater uses
Before you buy anything or pull anything apart, you need to know what type of heater you have and how its reflector is designed. Most standard freestanding propane heaters use a round, flat or slightly domed reflector panel, often 33 inches in diameter, that mounts to the burner head assembly using three studs, three wing nuts, and flat washers. That 3-hole mount with a center cap is extremely common across brands like Fire Sense, East Oak, AZ Patio Heaters, and many house-brand heaters sold at big-box stores. Tabletop propane heaters use a scaled-down version of the same design. Natural gas heaters typically follow the same mounting conventions as propane equivalents since the burner head geometry is similar.
Electric heaters are a different animal. Wall-mounted or ceiling-mounted infrared units often have a narrow trough-style reflector behind the heating element, not a dome. Freestanding electric umbrella heaters may have a reflector integrated into the lamp housing. Check your manual's parts diagram first, most list the reflector as a named part with a part number, which makes identification much easier. If you've lost the manual, the model number is almost always on a sticker at the base of the heater or on the control panel. Search that model number plus "parts diagram" or "owner's manual" and you'll usually find what you need.
Heater types and their typical reflector formats
| Heater Type | Typical Reflector Style | Common Mount |
|---|---|---|
| Freestanding propane (mushroom) | Round dome/cone, ~33" diameter | 3-stud, wing nut + washer |
| Tabletop propane | Smaller round dome, ~18–22" | 3-stud or center bolt |
| Freestanding electric (umbrella) | Dome or concave disc | Center bolt or clip-on |
| Wall/ceiling infrared electric | Trough or parabolic reflector | Integrated or bracket-mounted |
| Natural gas freestanding | Round dome, same as propane | 3-stud, wing nut + washer |
| Bromic Tungsten gas/electric | Stainless steel directional deflector | Brand-specific bracket |
Do you need a replacement, or just a cleaning or adjustment?
This is the question worth answering before you spend money. A lot of reflector problems are actually seating or fouling issues, not structural damage. Here's how to tell the difference.
Signs you just need to clean or reseat it
- Heat output seems weaker than usual but the burner flame and emitter glow look normal
- The reflector is visibly dirty, sooty, or has a thick film of oxidation on the underside
- The reflector wobbles or sits at a slight angle (wing nuts came loose over winter storage)
- Heat coverage is uneven, but the reflector surface looks intact with no obvious bends
- There's a rattling sound when the heater runs — a loose fastener, not a damaged panel
Signs you need to replace it
- Visible dents, warping, or a bent rim that can't be straightened without cracking
- Significant corrosion or pitting that has eaten through the surface coating
- A crack or hole in the reflector panel
- Discoloration so severe (from sustained overheating or a flare-up) that the surface has lost its reflective quality
- A missing center cap that's letting heat escape through the top
- Mounting holes that are stripped or distorted so the reflector can't sit level
It's worth noting that the emitter screen (the mesh that glows when the burner runs) is a separate part from the reflector. If you're seeing dark patches or uneven glow in the emitter screen, that's a different problem, don't confuse it with a reflector issue. The reflector sits above the emitter, not inside it.
How to measure and check compatibility before you buy
Most freestanding propane heaters use a 33-inch round reflector with a 3-hole mount. If you have one of those, you're in luck, there are plenty of compatible options. But "33 inch, 3-hole" isn't the whole picture. Here's what to measure and confirm before ordering.
- Outer diameter: Measure straight across the widest point of your existing reflector. Most standard units are 33 inches, but some are 31 or 35 inches — don't assume.
- Mounting hole pattern: Count the holes and measure the distance between them (center-to-center). A 3-hole mount is most common, but the spacing varies by brand.
- Stud height and washer stack: The reflector slides over studs that protrude from the burner head. Measure stud length — if a replacement reflector's mounting tabs are too thick or too thin, it won't sit flush.
- Center cap included or sold separately: Some replacement kits include the center cap, others don't. If your old cap is damaged, confirm the new one is included or order it separately.
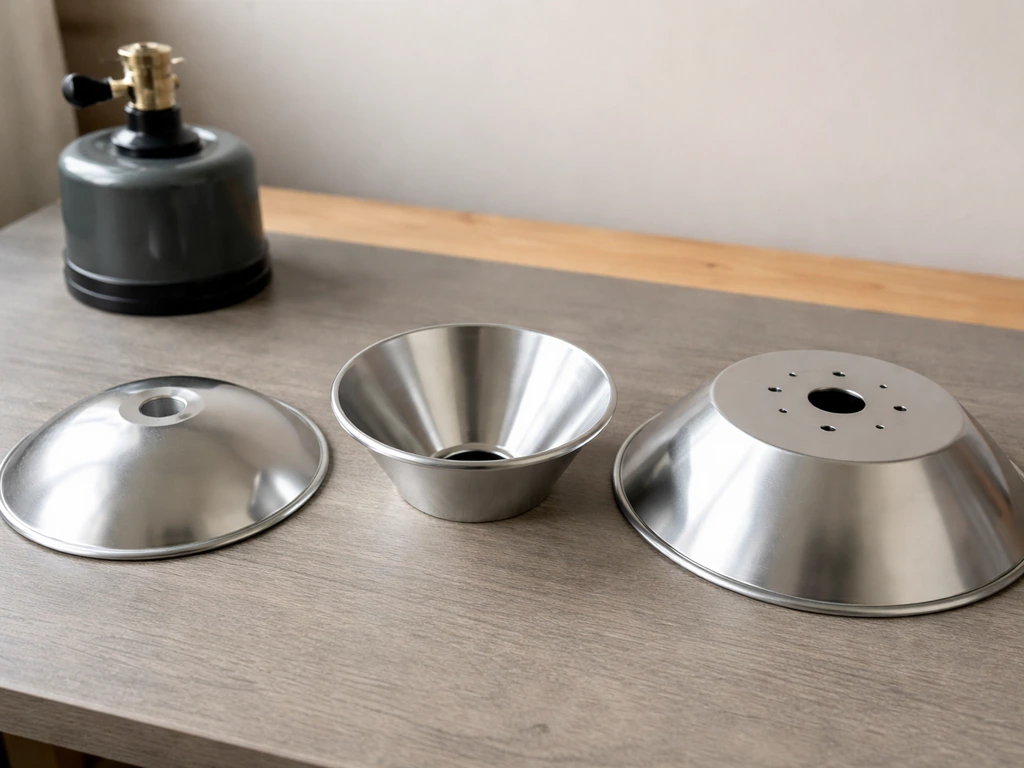
- Depth/dome height: A shallower dome reflects heat at a wider angle; a deeper dome is more focused. Try to match the geometry of your original if possible.
- Fuel type and brand restrictions: Some manufacturers, including East Oak, explicitly limit reflector compatibility by heater platform (propane vs. electric, for example). Check the product page carefully.
If you can find your heater's model number, cross-reference it on the replacement product listing before buying. OEM parts list the compatible model numbers explicitly. Aftermarket/universal listings may just say "fits most 33-inch propane heaters", which is usually true for common brands but not guaranteed for less common ones.
What to look for when buying a replacement reflector shield
Once you know your measurements, here's what actually matters when comparing options.
OEM vs. aftermarket vs. universal
OEM parts (ordered directly from the brand or an authorized parts dealer) give you guaranteed fit, correct geometry, and matched hardware. The downside is cost and availability, OEM reflectors for older models can be expensive or backordered. Aftermarket parts made for specific models (East Oak sells their own branded replacements, for example) split the difference: purpose-built for a platform at a lower price than OEM.
Universal reflectors are the most affordable and widely available option, typically sold as "33-inch aluminum, 3-hole mount" kits at retailers like Walmart and Amazon. If you are shopping for a replacement or a new setup, a paramount table top patio heater is a nearby comparison point for how reflector performance affects coverage. They work well for common heater designs, but you need to verify the hole spacing and stud dimensions yourself.
Material and heat resistance
Aluminum is the most common material and works well for most residential propane heaters, it's lightweight, corrosion-resistant, and reflects heat effectively. If you own a Hampton Bay table top patio heater, the same reflector concepts apply, so the right shield and proper fit matter for even, comfortable heat Aluminum is the most common material. Stainless steel reflectors (like Bromic's Tungsten gas heat deflector) are heavier but more durable and better at handling high sustained temperatures without warping. If you're running a higher-output commercial-grade unit, stainless is worth the extra cost. For a standard 40,000–48,000 BTU residential propane heater, aluminum is fine.
Single-piece vs. multi-panel design
Some reflectors ship as a single stamped panel; others come as multiple panels that assemble around the center cap (the exploded-view style you'll see in parts diagrams). Multi-panel designs are easier to ship and sometimes easier to install on a heater that's still mounted, but single-piece units tend to be more rigid and less prone to gaps between panels that can create uneven heat reflection. If you're choosing between the two for a standard mushroom-style heater, single-piece wins on performance, multi-panel wins on convenience.
| Option Type | Best For | Pros | Cons |
|---|---|---|---|
| OEM replacement | Exact model match, newer heaters | Guaranteed fit, correct geometry | Higher cost, may be backordered |
| Brand aftermarket (e.g., East Oak) | Heaters in that product line | Purpose-built, lower cost than OEM | Limited to specific platforms |
| Universal 33" aluminum kit | Common freestanding propane heaters | Widely available, affordable | Must verify hole spacing yourself |
| Stainless steel replacement | High-output or commercial units | Durable, warp-resistant | Heavier, more expensive |
| Multi-panel kit | Tight storage, awkward install positions | Easy to ship and handle | Risk of gaps between panels |
How to safely remove and install the reflector shield
Whether you're cleaning, reseating, or replacing, the process is essentially the same. The most important rule: the heater must be completely cool before you touch anything. This means off for at least 30 minutes for gas units and a full hour if the reflector felt warm to the touch recently. Do not rush this.
Removal
- Shut off the gas valve or unplug the electric heater completely. For propane, close the tank valve and disconnect the hose if you're working in a confined space.
- Wait for the heater to cool fully. Touch the pole near the head — if it's still warm, wait longer.
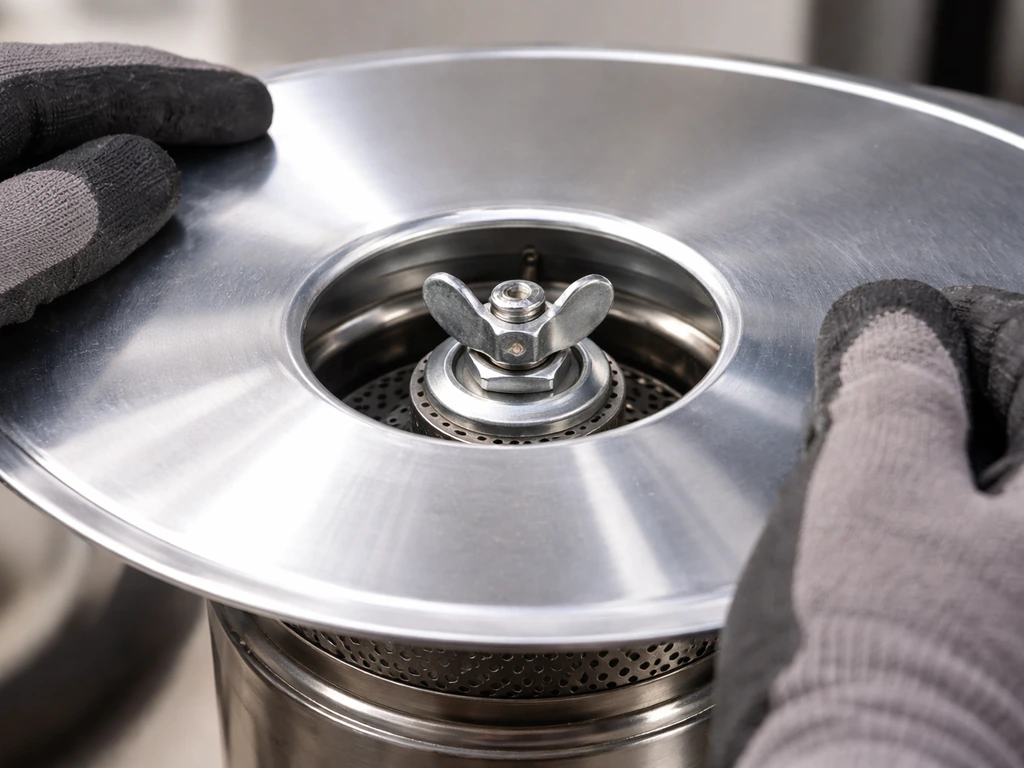
- Locate the wing nuts or screws holding the reflector to the burner head assembly. On most propane mushroom heaters, there are 3 wing nuts with flat washers underneath.
- Loosen and remove the wing nuts by hand — they should come off without tools. If they're corroded in place, use a pair of pliers but go gently to avoid stripping the stud.
- Slide the reflector panel up and off the studs. On multi-panel designs, panels may separate as you lift — keep track of the hardware.
- Remove the center cap if it's a separate piece. On some designs it just lifts off; on others it's held by a small screw.
- If cleaning: wipe down the reflector with a mild soap solution and a soft cloth. Avoid abrasive scrubbers on aluminum or stainless surfaces — they scratch the reflective coating and reduce effectiveness. Do not spray water directly at the burner head or emitter screen.
Installation (new or reinstallation)
- If your new reflector has a protective plastic film on the surface, peel it off before installation — it will burn if left on.
- Align the mounting holes in the reflector with the studs on the burner head assembly. On a 3-stud design, rotate the panel until all three holes line up.
- Slide the reflector down onto the studs so it sits flat against the mounting surface. It should rest level — if it's tilted, one hole isn't seated on its stud.
- Place a flat washer over each stud (washer goes between the reflector surface and the wing nut).
- Thread the wing nuts on by hand. Snug them down evenly — go around in a triangle pattern rather than tightening one fully before moving to the next.
- Do not overtighten. Wing nuts on aluminum reflectors only need to be hand-tight. Overtightening can distort the mounting tabs or crack the panel near the holes.
- Install the center cap and secure it with its screw if applicable. The cap should sit flush with no gaps around its perimeter.
- Give the reflector a gentle push in a few spots to confirm it's seated evenly and doesn't rock or wobble.
Troubleshooting after installation
After installing or reinstalling the reflector, fire up the heater and give it a few minutes to reach full output. Here's what to watch for and how to fix it.
Uneven heat coverage
If one side of the patio is noticeably warmer than the other, the reflector is probably not sitting level. Shut it down, let it cool, and check that all three wing nuts are equally snug. Also check that the heater itself is plumb, a tilted pole means a tilted reflector, and the heat cone will be skewed. Most freestanding heaters have leveling feet at the base for exactly this reason.
Rattling or vibration
A rattle usually means a loose fastener or a multi-panel reflector where panels aren't interlocked correctly. Turn the heater off, cool it down, and check each wing nut. If you have a multi-panel design, make sure the panels are overlapping or seated in the correct orientation, check your assembly diagram.
Gaps around the center cap
A gap between the center cap and the reflector panel lets heat escape upward, which defeats the whole point. If the cap doesn't sit flush, check whether it's the right diameter for the replacement reflector, this is a common mismatch when buying a universal kit where the cap is a slightly different size than the original. Wrapping the cap's base with a thin strip of high-temp aluminum tape is a workable short-term fix, but getting the correct matching cap is the right long-term answer. If you are shopping for a patio table top fire pit, make sure the heat direction and clearance requirements are compatible with the tabletop setup.
Discoloration after first use
Some light discoloration (yellowing or bronzing) on the reflector surface after the first few uses is normal, especially on aluminum. It's oxidation from the heat and doesn't meaningfully affect performance. Heavy black soot buildup, on the other hand, does reduce reflectivity, that's a sign the burner needs tuning or the air-to-fuel mix is off, not just a dirty reflector. Clean the reflector regularly (once or twice a season) to keep it working efficiently.
Heat output still weak after replacement
If you've installed a new, correctly seated reflector and the heater still underperforms, the reflector wasn't the only problem. Check the emitter screen for damage or clogging, verify the gas pressure and regulator are functioning correctly, and inspect the burner orifice for blockage. Weak heat with a properly functioning reflector points to a fuel delivery or combustion issue, not the shield itself.
Quick safety checklist before running the heater
- Reflector is fully seated and level, all fasteners snug
- Center cap is in place with no visible gaps
- No tools, rags, or debris left on or near the reflector
- Gas connections retightened if you disconnected the hose during work
- Heater is on a stable, level surface before ignition
- Never leave the heater unattended immediately after restarting post-maintenance
FAQ
My patio heater has a reflector but it looks a little misaligned, is it still safe to use?
A reflector that is slightly off-level can reduce heat evenness, but you should not run the heater if the center cap is not seated securely or if the shield is warped enough to create visible gaps. Turn it off and let it cool, then verify all mounting points are snug and the shield sits flush around the center cap before relighting.
How do I tell if my issue is a reflector problem or something with the emitter screen?
A reflector issue usually shows as uneven warmth around the patio or weak overall output while the burner glow remains generally consistent. If you notice dark patches, abnormal orange spots, or a noticeably uneven mesh glow on the emitter screen, that points to clogging or damage at the emitter, not the reflector, since the reflector sits above it and does not alter the screen’s glowing pattern.
What hole spacing measurements should I confirm for a universal patio heater top reflector shield?
Besides overall diameter, confirm the distance between the three studs (center-to-center spacing) and the stud diameter or bushing size. Universal kits that list “33-inch, 3-hole” can still vary in stud height and washer thickness, which can prevent the center cap from sitting flush.
Can I reuse the wing nuts, washers, or studs from my old shield?
You can usually reuse hardware if it’s undamaged, but replace any wing nuts or washers that show corrosion pitting or strip wear. If the shield uses a specific center cap fit, old or mismatched hardware can leave a small air gap that defeats the reflector’s function.
What’s the best way to clean a reflector shield without damaging it?
Let the heater cool fully, then remove the shield only if the buildup is heavy. Use a soft brush or non-abrasive pad and mild degreasing cleaner if needed, avoid wire brushes that scratch aluminum. If you see soot, focus on cleaning the burner area during the next check as soot often indicates combustion tuning needs.
How often should I inspect and clean the patio heater top reflector shield?
A practical schedule is once or twice per season, plus an inspection after any strong wind exposure, transport, or any time you notice a change in heat distribution. If the reflector shows heavy black deposits after normal use, inspect burner combustion components too, since dirty soot is usually not just a reflector hygiene issue.
Do I need to use aluminum tape at all, or is it only a temporary fix?
Aluminum tape around the center cap base is a short-term workaround when you have an imperfect cap-to-reflector match. It is not a substitute for the correct matching center cap and reflector geometry, because tape thickness and placement can change how heat redirects, and the adhesive can degrade under sustained high heat.
If my reflector is dented, should I replace it or can I straighten it?
Replace it. Even a small dent can change the reflector angle and create hot or cold zones, and repeated heat expansion can make minor bends worsen over time. Straightening stamped aluminum can also leave stress points that encourage corrosion or warping.
Why does my heater create one warm side and one cooler side after replacing the top reflector shield?
Most often it is seating or level. Recheck that all three wing nuts are tightened evenly, confirm the heater pole is plumb, and ensure the leveling feet are adjusted to an even stance. If the reflector is multi-panel, also verify panels overlap and sit in the intended order.
Is stainless steel always better than aluminum for a patio heater top reflector shield?
Not always. Stainless is more durable and resists warping at higher sustained temperatures, but it is heavier and typically costs more. For typical residential BTU propane heaters, aluminum is usually sufficient and lighter to handle, while stainless is worth it if your unit runs hotter, more continuously, or is rated for harsher duty.
What should I do if the new reflector fits but the center cap still doesn’t sit flush?
Stop and confirm you have the correct diameter and cap style for that exact reflector kit. A small mismatch can let heat escape upward and reduce effective coverage. If the kit includes different cap sizes, use the one that matches the reflector’s center opening and stud pattern, rather than forcing an improper fit.
After installing a new reflector, the heater seems slightly weak, how long should I wait before troubleshooting?
Run the heater for a few minutes at normal settings to reach steady output before judging performance. If it remains weak after reaching full output, proceed to checking the emitter screen condition and then combustion variables like gas pressure/regulator function and burner orifice blockage, since underperformance usually is not caused by the shield alone.