The best electric infrared patio heater for most people is a 2,000–4,000 watt wall- or ceiling-mounted unit from a brand like Infratech, Bromic, or Dr. Infrared Heater. Mounted correctly, one of these heaters will warm a 10x12 to 12x20 foot covered patio effectively, turns on instantly with no fumes or open flames, and costs about $0.24–$0.48 per hour to run at average US electricity rates. If you want a portable option or are heating a small balcony, a 1,500W tabletop or freestanding unit works well for spot heating. The real key is matching wattage to square footage and making sure the heater is rated for outdoor use, not just indoor use with a patio-friendly label slapped on it.
Best Electric Infrared Patio Heater: Buyer Guide

Willa Brennan
25 Jun 2026
What an electric infrared patio heater is (and why it heats differently outdoors)
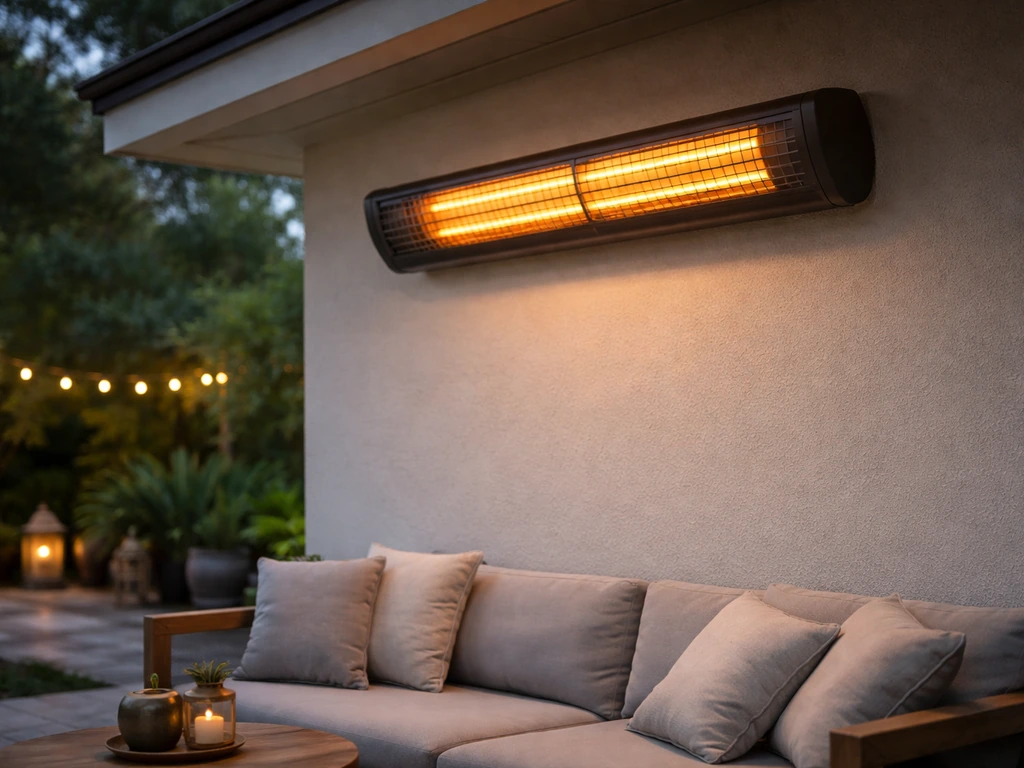
An electric infrared patio heater blank" rel="noopener noreferrer">works by running electrical current through a high-resistance heating element until it gets extremely hot. That element then emits infrared radiation, invisible light waves that travel outward and warm any solid surface or body they hit, rather than warming the air itself. That's the key difference between infrared and a standard electric forced-air or convection heater: infrared doesn't need to heat the air around you to make you feel warm. The radiation hits your skin, your furniture, your jacket, and you feel the heat directly.
Outdoors, this matters enormously. Convection heaters waste most of their energy heating air that just blows away. An infrared heater sends warmth in a directed beam, so even on a mildly breezy evening, you still feel the heat. That's why infrared is the standard choice for open and semi-open patios, and why nearly every professional outdoor heating installation uses it.
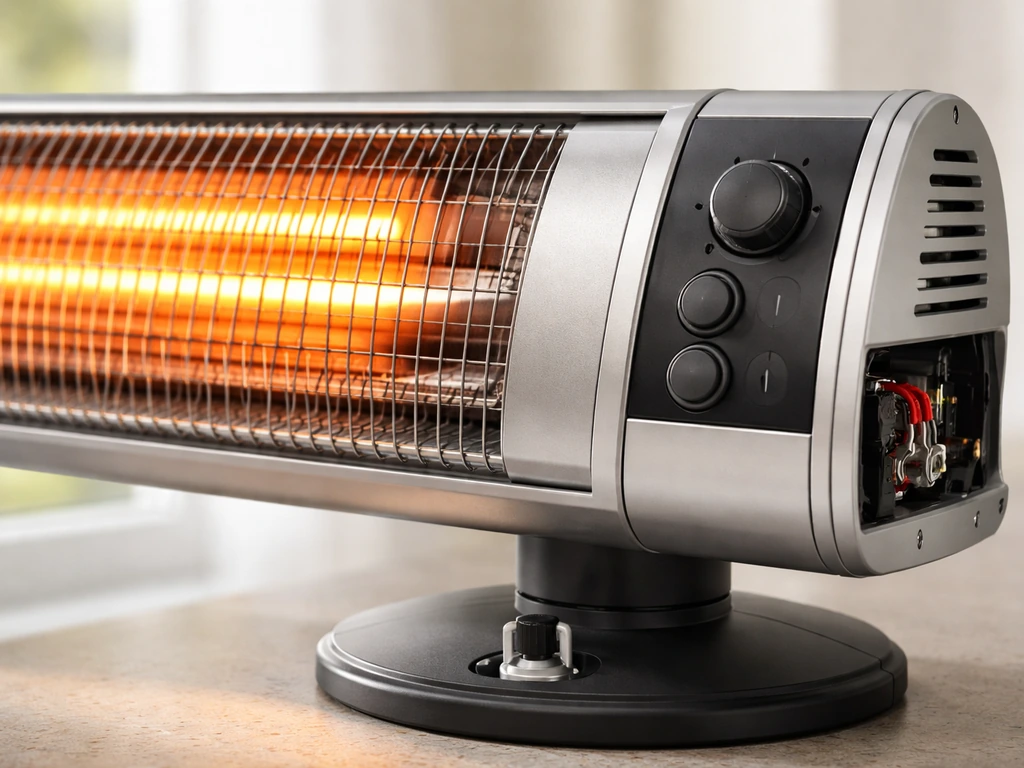
The heating element type affects your experience more than most brands admit. Carbon fiber and quartz-halogen elements produce a visible orange glow, heat up almost instantly, and throw heat over longer distances. Ceramic elements run at lower surface temperatures, produce less glare, and feel a bit softer, but take slightly longer to warm up. Most residential outdoor units use quartz or carbon elements. If you're sensitive to the glow of a halogen-style heater, especially near a bedroom window, look for a carbon or ceramic model marketed as 'low-glow' or 'no-glow.'
One thing worth clarifying before you buy: not every outdoor electric heater is an infrared heater. Some patio-marketed electric heaters use a fan and heating coil (essentially a heat gun) or a heated column design that's mostly convective. To confirm you're buying a true infrared unit, look for the word 'radiant' or 'infrared' in the product specs, and check that the product description mentions an emitter element type (quartz, carbon, ceramic). If it only mentions a 'heating coil' and a fan, it's not infrared.
How to choose the best one for your space
Wattage is the electric infrared equivalent of BTUs on a propane heater. The generally accepted rule is roughly 10 watts per square foot for a covered patio, and 15–20 watts per square foot for an open or partially open space where heat disperses more quickly. If you are comparing specific models after you match the right wattage and mounting height, check the briza infrared patio heater review as a related option. So a 150 square foot covered porch needs a 1,500W heater at minimum, and a 200 square foot open deck might need 3,000–4,000W to feel genuinely warm on a cool evening.
| Space Size | Covered Patio (watts) | Open/Semi-Open Patio (watts) | Recommended Mounting Style |
|---|---|---|---|
| Up to 100 sq ft (small balcony) | 1,000–1,500W | 1,500–2,000W | Portable/tabletop or wall-mount |
| 100–150 sq ft (small porch) | 1,500–2,000W | 2,000–3,000W | Wall or ceiling mount |
| 150–250 sq ft (medium patio) | 2,000–3,000W | 3,000–4,000W | Ceiling mount or 2x wall-mount |
| 250–400 sq ft (large covered porch) | 3,000–4,000W | 4,000–6,000W+ | Multiple ceiling-mount units |
| 400+ sq ft (large open deck) | 4,000–6,000W | 6,000W+ or multiple units | Multiple ceiling or pole-mount units |
Beyond wattage, pay attention to heat throw angle and beam spread. Most residential infrared heaters project heat in a roughly 60–90 degree cone. A narrow beam (60 degrees) concentrates heat in a smaller zone, good for a seating area or spot heating a specific chair. A wider spread (90+ degrees) covers more ground but with less intensity at the edges. For long, narrow covered porches, a single 4,000W unit mounted centrally often works better than two smaller units at the ends.
Mounting height matters just as much as wattage. Most manufacturers spec their heaters for a ceiling or wall height of 8–10 feet. Mount it too high and heat dissipates before it reaches you. Too low and it's uncomfortably intense. The sweet spot for most residential setups is 7.5 to 9 feet above the floor or seated head height. Wall-mounted units should be angled 30–45 degrees downward toward the seating area.
Outdoor readiness: weather ratings, wind, and where to place it
This is where a lot of buyers get burned (figuratively). Many electric heaters are marketed with patio photos but are actually rated for covered, protected areas only. If you want a heater that can handle rain, moisture, and real outdoor conditions, you need to check the IP (Ingress Protection) rating on the spec sheet. For outdoor use, you want at minimum IP44 (splash-proof from all directions) and ideally IPX4 or higher.
Infratech certifies its entire outdoor line at IPX4, and Bromic's Tungsten Smart-Heat Electric series carries IPX4 as well, both verified through third-party testing (UL/cUL for Infratech, Intertek ETL/cETL for Bromic). Those ratings mean the heater can handle rain splash and condensation, not that you should point it directly into a downpour.
Wind is the biggest practical challenge for any outdoor heater, and infrared handles it better than most alternatives. Because infrared heats objects rather than air, a gust doesn't 'blow away' your warmth the way it would with a propane tower heater. That said, wind can still affect comfort on fully open patios by chilling your skin faster than the infrared can compensate. In consistently windy locations, go one size up in wattage, or look at heaters with a narrower, more focused beam to concentrate heat more effectively.
For placement, the covered vs. uncovered question really comes down to two things: electrical safety and heat efficiency. Under a roof overhang or pergola, you get protection from direct rain and can mount closer to the optimal height. On a fully open deck, you need a heater explicitly rated for exposed outdoor use (IP55 or higher is safer), and you should expect to need more wattage to get the same comfort level. Portable freestanding units are worth considering for open patios where you want flexibility, just keep in mind they work best as spot heaters, not whole-patio solutions.
Safety and usability features worth paying for
Safety features on electric infrared heaters are less dramatic than on propane (no open flame, no gas leak risk), but they still matter, especially if kids or pets use the space.
- Overheat protection: An internal thermal cutoff that shuts the heater down if internal temps exceed a safe threshold. This is standard on quality units but absent on cheap imports—check for it explicitly.
- Cool-touch housing: Carbon and quartz elements get extremely hot, but the outer housing on well-designed units stays touchable. Look for this if children or pets are around.
- Tip-over shutoff: Essential for freestanding portable units. If the heater falls, it cuts power immediately. Not relevant for wall/ceiling-mounted units but non-negotiable for floor-standing models.
- Waterproof or weather-rated electrical connections: The power cord entry point and any external wiring should be sealed. Check for IP-rated conduit fittings on hardwired installations.
- UL, ETL, or CE certification: Third-party certification is the fastest way to screen out unsafe units. Infratech carries UL/cUL listing; Bromic carries ETL/cETL from Intertek. Avoid any unit with no listed safety certification.
- Timer and thermostat controls: Not strictly safety features, but a built-in timer prevents you from leaving a heater running unattended for hours. A thermostat saves energy and protects the unit from sustained max-load operation.
On the usability side, remote controls and smart home compatibility have become common on mid-range and premium units. If you're mounting a heater 9 feet overhead, you'll really appreciate a remote. Some units (including Bromic's Smart-Heat line) integrate with smart home systems so you can control them via app or voice. For most people, a basic remote with on/off and heat level settings is plenty. Warm-up time on electric infrared is near-instant, most units reach operating temperature in under 60 seconds, which beats propane and is much faster than pellet heaters.
Running costs and how electric infrared compares to other fuel types
At the US average electricity rate of roughly $0.16 per kWh (as of mid-2026), a 1,500W heater costs about $0.24/hour to run. A 4,000W unit runs about $0.64/hour. A 20-pound propane tank (about $25–30 refilled) gives you roughly 20 hours of runtime on a mid-size propane patio heater, that's $1.25–1.50/hour. Natural gas is cheaper per BTU than both, but requires a gas line and professional installation. Pellet heaters are the most fuel-flexible but highest maintenance option.
| Fuel Type | Approx. Hourly Cost | Startup Time | Wind Resistance | Installation Complexity | Best For |
|---|---|---|---|---|---|
| Electric infrared (1,500W) | ~$0.24/hr | Under 60 sec | Good (heats objects) | Low (plug-in) to medium (hardwired) | Covered patios, small spaces, apartments |
| Electric infrared (4,000W) | ~$0.64/hr | Under 60 sec | Good | Medium (hardwired 240V) | Large covered porches, commercial patios |
| Propane (40,000 BTU) | ~$1.25–1.50/hr | 15–30 sec | Poor (heats air) | None (portable) | Open patios, tailgating, no power access |
| Natural gas (fixed) | ~$0.40–0.60/hr | 15–30 sec | Moderate | High (gas line required) | Permanent installations, large patios |
| Pellet heater | ~$0.50–1.00/hr | 10–15 min | Poor | Medium to high | Ambiance + heat, relaxed use cases |
The honest take: electric infrared is the most cost-effective option for covered patios and the easiest to install for most homeowners. It's not the cheapest per hour for large open spaces (where you need a lot of wattage to fight heat loss), and it depends on having a nearby power outlet or the willingness to run a dedicated 240V circuit. If you're heating a big open deck with no electrical infrastructure, a propane unit is still a more practical starting point. But for the majority of covered porch and patio setups, electric infrared wins on convenience, safety, and total cost.
The best electric infrared patio heaters: a practical short-list
Here are the models I'd recommend across different budgets and use cases. These are all genuinely infrared, outdoor-rated, and available as of mid-2026. I've kept this tight rather than listing 20 models, because honestly, most people just need one reliable recommendation for their situation.
| Model | Wattage | IP Rating | Mounting Style | Best For | Approx. Price |
|---|---|---|---|---|---|
| Infratech W-Series (W-2524) | 2,500W (single element) | IPX4 (UL/cUL listed) | Ceiling or wall mount | Medium covered patio (150–200 sq ft) | $350–$450 |
| Bromic Tungsten Smart-Heat Electric 2000W | 2,000W | IPX4 (ETL/cETL certified) | Wall or ceiling mount | Small–medium covered patio, smart home users | $500–$650 |
| Bromic Tungsten Smart-Heat Electric 4000W | 4,000W | IPX4 (ETL/cETL certified) | Ceiling mount | Large covered porch (200–300 sq ft) | $700–$900 |
| Dr. Infrared Heater DR-238 (1,500W) | 1,500W | IP44 | Portable/freestanding | Small patios, balconies, spot heating | $80–$130 |
| Warmup Infrared Outdoor Panel | 1,800–2,400W | IP55 | Wall mount | Semi-exposed patios, pergolas | $250–$400 |
| Stiebel Eltron CIR 150/200 | 1,500–2,000W | IP24 | Wall or ceiling | Covered patio, garage, enclosed porch | $200–$320 |
For most homeowners with a covered patio under 200 square feet, the Infratech W-2524 or the Bromic Tungsten 2000W are the go-to choices. Infratech is the better value, Bromic edges it out on smart controls and a slightly more polished aesthetic. For large covered porches over 250 square feet, two Bromic Tungsten 4000W units mounted 8–10 feet overhead and positioned to overlap their heat zones will give you restaurant-level outdoor comfort. If you're on a budget or just need something portable for a small balcony or apartment terrace, the Dr. Infrared DR-238 is a legitimate outdoor-rated unit that punches well above its price point.
It's worth noting that Bromic and Infratech also have detailed reviews covered elsewhere on this site, including side-by-side comparisons across infrared heater types and radiant patio heater reviews that go deeper on specific models if you want to dig further before buying. A good way to narrow down the best infrared heater for patio use is to focus on wattage, beam spread, and an IP rating for real outdoor conditions reviews covered elsewhere on this site.
Sizing tips and a setup checklist to get results fast
Before you order anything, take five minutes to answer these questions. They'll save you from buying the wrong unit or dealing with an install problem after the heater arrives.
- Measure your patio: length x width in feet. Note whether it's fully covered, semi-covered (pergola, shade sail), or fully open.
- Check your ceiling or mounting height: measure from floor to the underside of the roof or planned mount point. Anything below 7 feet means you need a lower-wattage unit (or a different placement angle) to avoid hot spots.
- Find your nearest power source: standard 120V outlets handle up to 1,500W. Anything higher (2,000W+) needs a 240V dedicated circuit. If you don't have one, budget $150–$400 for an electrician to run one.
- Decide on mounting style: wall-mounted units work well on covered porches with a solid wall adjacent to the seating area; ceiling-mounted units cover more ground symmetrically and are better for square or open patio shapes.
- Check the IP rating matches your exposure: IPX4 for covered areas with splash risk, IP55 or higher for fully exposed outdoor installations.
- Confirm safety certification: look for UL, ETL, CE, or cUL on the product spec sheet—not just on the Amazon listing title.
- Plan your control setup: if the heater mounts above 8 feet, make sure it comes with a remote or supports a wall switch dimmer. Hardwired units can be paired with compatible dimmer switches for variable heat output.
- Size up if you're near the edge of a wattage range: if your calculation puts you right at the boundary (say, a 160 sq ft semi-open patio suggesting 2,400W), go to the next step up (3,000W). You can always dial back output on a dimmable unit, but you can't add watts you don't have.
Setup itself is straightforward for plug-in portable units, mount a bracket, hang the heater, plug it in, aim it at your seating area. For hardwired 240V ceiling or wall units, the physical installation takes about an hour if you're comfortable with basic DIY, but I'd recommend having a licensed electrician handle the circuit work if you're not. Once it's up and you've set the angle correctly, an electric infrared heater requires almost zero maintenance: no fuel refills, no burner cleaning, no pilot light to relight. The elements last thousands of hours, and the biggest ongoing task is occasionally wiping the reflector dish to keep it clean.
One last thing: if you're shopping for a UK-based patio setup, the model availability and voltage standards differ from US products, there's specific guidance on the best infrared patio heater options for UK buyers worth checking separately, since wattage ranges, IP requirements, and available brands vary noticeably. If you're shopping specifically for the best infrared patio heater UK, pay extra attention to UK voltage, IP weather ratings, and the heater's emitter type. For everyone else, the short list above covers what's widely available and genuinely tested for outdoor use in North American conditions.
FAQ
How can I tell if an electric patio heater is truly infrared (radiant), not just a fan heater?
Check the technical specs for an emitter type (quartz, ceramic, or carbon) and look for “radiant” or “infrared.” If the listing only emphasizes a fan, “heating coil,” or “forced air,” it’s usually convective and won’t feel as directed.
Do I need 240V for the best electric infrared patio heater, or will a standard outlet work?
Some wall or ceiling infrared models are hardwired on 240V circuits for higher wattage, while portable units often use a regular plug. If a unit is rated 2,000W to 4,000W, confirm input voltage on the nameplate and check whether your outlet or circuit can support it safely.
What heat throw angle should I choose if my seating area isn’t square or is long and narrow?
Use beam spread as a layout tool. A narrower cone (around 60 degrees) concentrates intensity for a specific chair or loveseat, while a wider cone covers more rows of seating. For long porches, centered mounting can beat end-to-end placement if the cone overlap is designed for the room length.
Can infrared heaters heat an entire patio, or do they only warm people nearby?
Infrared warms surfaces and bodies it “sees” directly, so it behaves like directed heating. On covered patios under about 10x12 to 12x20, a correctly sized mounted heater can cover the space well, but on open decks expect spot coverage and plan for higher wattage and repeat coverage.
Will wind really matter less with infrared, and when should I size up anyway?
Wind usually reduces comfort with heaters that warm air, infrared still performs better because it warms objects. However, in consistently windy locations you may feel skin cooling before the radiation keeps up, so sizing up wattage or using a narrower, more focused beam can help.
What IP rating is enough for real rain, and should I expect “waterproof” to mean “hose it down”?
Minimum outdoor comfort is typically IP44 for splash exposure, with IPX4 or higher being better for rain and condensation. Do not assume a high IP rating means you can direct water at the heater, it still needs proper mounting and should be installed so runoff cannot pool around the electrical connections.
How far should the heater be from walls, furniture, or a ceiling to avoid damage or unpleasant glare?
Follow the clearance and mounting-height specs in the manual, then add practical spacing for rugs, curtains, and low-profile furniture. If you’re near a bedroom window, element type matters too, carbon or ceramic (low-glow) usually feels better than quartz-halogen where glare is more noticeable.
Is it normal for an electric infrared patio heater to smell when it first turns on?
A brief odor during the first heat cycle can happen from manufacturing residue or dust warming on the reflector. If the smell persists, is accompanied by unusual noise, or appears after cleaning, stop using it and check installation and ventilation around the unit.
How much electricity should I expect to use, and what’s the quick way to estimate cost?
Estimate runtime cost as watts divided by 1,000, multiplied by your electricity rate per kWh. For example, a 2,000W heater is about 2 kWh per hour, so at $0.16 per kWh it’s roughly $0.32 per hour before any tax or rate-plan variation.
What safety features should I look for if I have kids or pets outdoors?
Prioritize tip-over and overheat protection for portable units, and look for enclosed heating elements, cool-touch housing (if available), and a proper outdoor-rated power connection. Even with no flame, keep the operating zone away from traffic paths and avoid direct access by pets.
Do I need to maintain the reflector or glass, and how often should I clean it?
Plan to wipe the reflector dish periodically, especially if you live in dusty or pollen-heavy areas. A light cleaning prevents reduced performance and hot spots from debris buildup, and it’s usually best when the heater is cool and unplugged or de-energized.
Is it worth paying extra for smart control and a remote, or is a basic switch enough?
Smart controls are most valuable when the heater is mounted high, used frequently, or you want scheduling and room-by-room automation. If the unit is low-access and you only turn it on occasionally, a simple remote with on/off and heat levels may cover your needs without extra complexity.
Can I run an infrared patio heater on a timer or smart plug?
You generally should not rely on standard smart plugs unless the manufacturer explicitly allows it and the power draw matches the plug’s rated amperage. For higher-wattage wall or ceiling heaters, hardwired controls or manufacturer-approved solutions are safer and more reliable.