
A missing or damaged top shield reflector is not a minor cosmetic problem. It directly reduces heat output, exposes the burner head to wind and rain, and creates a genuine safety hazard. The good news is that a compatible replacement is almost always available, either as an OEM part from the manufacturer, a universal aftermarket piece, or a salvaged original, and fitting one correctly comes down to five measurements, a bolt-hole check, and knowing which finish holds up in your climate. For model-specific parts and fit guidance, see patio heater top.
Replacement Top Shield Reflector for Outdoor Propane Patio Heaters

Willa Brennan
6 Aug 2026
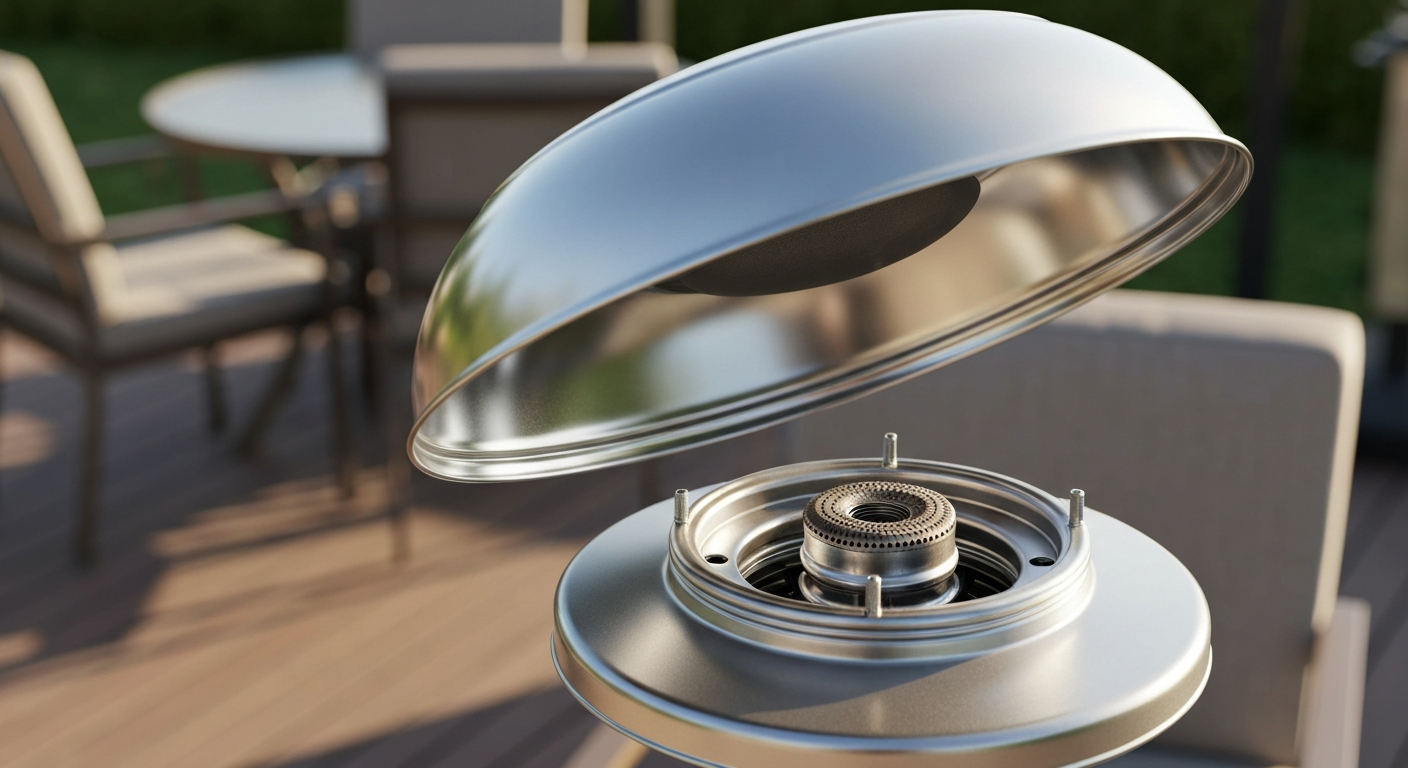
Why the top shield reflector actually matters
Most people focus on the burner or the fuel system when a patio heater stops performing well, but the reflector does a lot of the heavy lifting. It sits directly above the emitter screen and works in three ways at once: it bounces infrared heat downward toward the people standing nearby, it shields the flame from wind gusts that would otherwise snuff it out or cause uneven burning, and it keeps rain off the burner head. For more on choosing and fitting a compatible patio heater top reflector shield, see the dedicated guide. Without it, you lose a substantial chunk of the effective heating radius and risk burner damage from moisture.
This matters even more for tabletop units. A tabletop patio heater or tabletop fire pit sits at arm's reach, so a cracked, warped, or missing reflector is more than a performance issue, it becomes a burn hazard for people seated close to it. Manufacturer manuals, including those from Hampton Bay and Fire Sense, are explicit on this point: do not operate the heater unless the top assembly (reflector included) is fully and correctly installed. For model-specific parts, check Hampton Bay table top patio heater parts and manuals through the manufacturer's support resources.
What a top shield and reflector actually do
The dome or panel assembly above the burner head serves three overlapping functions. First, heat distribution: the concave underside of a reflector is shaped to redirect upward-rising infrared energy back down in a cone pattern, widening the warm zone at ground level. A flat reflector spreads heat more broadly but with less concentration; a deep dome focuses it tighter. Second, flame protection: the shield acts as a physical wind barrier, and on many models the outer edge overlaps the emitter screen enough to break crosswinds that would destabilize the flame. Third, safety: it keeps the hottest surface of the heater contained and directs radiant heat away from the fuel canister below.
Top shield shapes and how they mount
Standing mushroom-style propane heaters almost always use a round dome reflector, typically ranging from 30 to 38 inches in diameter on full-size models. The most common mounting method is a 3-stud or 3-hole pattern, where the reflector drops over three threaded barrel studs projecting from the emitter or head assembly and is secured with washers and wing nuts. Some models use a 4-stud pattern. A center hole is standard on most round reflectors, sized to fit over the chimney tube or center post of the heater head.
Tabletop units are a different story. Many tabletop patio heaters use a square or rectangular top shield, like the 17.5 x 17.5 inch aluminum square shield available at Home Depot (model 191OFPH012), which mounts to a 3- or 4-point bracket rather than dropping over a chimney. Tabletop fire pits, including some AZ Patio Heaters round tile-top models, may use a separate heat shield ring or tile surround rather than a dome-style reflector. Knowing which category your unit falls into is the first step before ordering anything.
Three common mounting types at a glance
- Panel-and-cap assembly: multiple removable reflector panels attach to 3 or 4 reflector studs around the emitter, with a separate center cap securing the top. Common on Fire Sense models. Replacement is sold as a panel kit or full assembly.
- One-piece dome with center chimney hole: a single stamped dome drops over the chimney tube and secures to 3 barrel studs through the emitter screen using wing nuts and washers. Common on Hampton Bay standing heaters.
- Square or bracket-mounted top: a flat or slightly curved square top mounts to a 3- or 4-point bracket below it. More common on tabletop and pyramid-style heaters.
Compatibility and measurement checklist
This is where most people make mistakes. Eyeballing the shape is not enough. Before you order anything, pull out a tape measure, a pair of digital calipers if you have them, and ideally a piece of cardboard to make a paper template of your existing bolt pattern. Here are the six measurements you need. For details on measuring bolt-circle diameter (BCD) and converting chord measurements to BCD using the standard formula, see Bolt Circle Calculator & How‑to (BCD/PCD measurement guide).
- Outer diameter (OD): measure the full width of the existing reflector rim-to-rim in inches. Common sizes for full-size standing heaters are 30", 32", 33", and 38". For tabletop units, measure length and width if it is square or rectangular.
- Center-hole (chimney) diameter: measure the inside diameter of the center hole. This must clear the chimney tube of your specific model. Being even 1/4 inch off here means the reflector will not sit flat.
- Number of mounting holes: count the stud or bolt holes. Three is most common on consumer models; four is less frequent but does appear on some larger units.
- Bolt-circle diameter (BCD): measure center-to-center across opposing holes on a 3-hole pattern using a chord-and-formula method, or use a bolt-circle calculator with the chord measurement from adjacent holes. Aftermarket listings commonly cite hole spacing of 6 to 7 inches center-to-center.
- Individual hole diameter: use calipers to measure each hole's inside diameter. Hampton Bay hardware lists reference M6 and M8 fasteners (approximately 6mm and 8mm), so verify whether your studs are M6 or M8 before ordering replacement hardware.
- Reflector thickness and flange/edge-lip depth: thickness affects whether the wing nut and washer stack will clamp correctly. A thicker aftermarket piece on short studs may not secure fully.
One practical tip: if your old reflector is still in one piece even if damaged, lay it on cardboard and trace the outer edge and all hole positions. This paper template is your backup verification when comparing it to an aftermarket replacement before final installation.
How to identify the exact replacement part
The cleanest route is finding the OEM part number. Check three places in this order: the owner's manual (a parts list or exploded diagram near the back usually assigns a letter or number to the reflector), the heater's rating plate or sticker (usually on the lower pole or base casting), and the manufacturer's website or customer service line. Hampton Bay manuals, for example, label the reflector as part 'A' and list accompanying hardware by specific fastener codes. Fire Sense reseller listings reference SKUs like 61956 for a 32-inch round reflector and 61437-compatible listings for 38-inch one-piece units.
If the manual is lost, the manufacturer's customer service is still your best first call. Both Hampton Bay and Fire Sense manuals specifically direct customers to contact customer service for replacement or missing parts, and they can cross-reference your model number to the correct reflector assembly. Your model number is the key, have it ready before you call or email.
For universal and aftermarket parts, search using your OD measurement plus hole count as the primary filter. A listing that says '33-inch, 3-hole stud mount' is a reasonable candidate for many full-size standing heaters, but read the product description carefully. Some sellers explicitly note that drilling or hole rework may be required for certain brands, that is a signal to double-check your BCD against their stated hole spacing before buying.
Material and finish options: what holds up and what does not
Reflectors live directly above a combustion source and outdoors in rain, humidity, and UV. The material and finish you choose will determine how long it lasts and how much maintenance it needs. Here is an honest breakdown of the main options.
| Material / Finish | Heat Resistance | Corrosion Resistance | Weight | Typical Cost Range | Best For |
|---|---|---|---|---|---|
| Stainless steel (brushed or polished) | Excellent | Very good (with care) | Moderate to heavy | $50–$100+ | Humid coastal climates, long-term durability |
| Aluminum (bare or anodized) | Good | Good (naturally oxide-resistant) | Light | $30–$85 | Budget replacement, weight-sensitive tabletop units |
| Powder-coated steel | Good | Moderate (chips expose bare steel) | Moderate | $35–$75 | Inland or covered patio use, matching finish priority |
| Hammer-tone bronze/black coated steel | Good | Moderate (same chip vulnerability as powder coat) | Moderate | $40–$90 | Aesthetic match for Fire Sense or hammer-tone heaters |
Stainless steel is the material I personally reach for when longevity matters more than price. It handles the heat cycling well, does not peel or chip, and resists surface rust under most conditions, though it is worth noting that lower-grade stainless can still show surface oxidation if left wet repeatedly. Aluminum is the most common material in the universal aftermarket pool and performs fine for most climates; it is lighter, which makes reinstallation easier on taller standing heaters. Powder-coated and hammer-tone steel pieces look great new but the coating around the mounting holes tends to chip during installation and around the bolt washers over time, which is where rust typically starts.
Design features that affect how well it heats
Not all reflectors redirect heat equally. A few design details make a real difference in performance, and they are worth comparing when you have more than one compatible option.
- Dome depth vs. flat profile: a deeper dome concentrates heat into a tighter cone below the heater, which works well for a small seating group directly beneath it. A shallower or flat reflector spreads heat more broadly, which is better for open, wider areas. Most full-size standing heaters use a moderately domed profile.
- Ventilation slots or perforations: some reflectors include small vent holes near the center to prevent heat buildup directly against the chimney cap. If your original had vents, replacing it with a solid-dome aftermarket piece can cause the center-cap area to overheat.
- Edge lip or rolled rim: a downturned edge lip on the reflector perimeter helps direct heat forward and slightly downward, improving efficiency. It also stiffens the sheet metal and makes the piece more rigid over time.
- Weight and balance: a heavier reflector on a tabletop unit can raise the center of gravity and make the heater tip-prone. Check your unit's tip-over safety switch sensitivity if you are replacing a lightweight original with a heavier stainless unit.
- Finish longevity at the center: the center of the reflector is closest to the heat source. Painted or coated finishes almost always discolor or peel there first. Stainless or bare anodized aluminum holds up better in that high-heat zone.
OEM vs. aftermarket vs. DIY: which route makes sense
OEM parts are the easiest path when the heater is less than two or three years old and the manufacturer still stocks them. You get a guaranteed fit, the correct hardware, and no guesswork about hole patterns. The downside is cost, branded replacement assemblies often run higher than universal aftermarket pieces, and availability drops fast on discontinued models.
Universal aftermarket reflectors (brands like HQQ, Kisworm, TopHill, and EAST OAK appear frequently on major marketplaces) are priced from about $30 to $90 for a 33-inch aluminum dome. They fit a wide range of full-size standing heaters with a 3-hole stud pattern, but fit is not guaranteed without measurement verification first. Read the seller's notes carefully, some explicitly say drilling may be needed for certain brands. Budget an extra 30 minutes the first time for fitting and minor adjustment.
Salvage and secondary markets (eBay regularly shows 30-inch to 38-inch tops, both new old-stock and used OEM pieces) are worth checking if you own an older or discontinued model. You can sometimes find an exact-match original for less than a new universal piece, and the hardware match is already proven. Just inspect photos carefully for rust pitting around mounting holes and warping along the edge.
DIY fabrication is a last resort but it does come up for discontinued commercial-grade units. A local sheet-metal shop can cut a round disk to your OD and center-hole spec and drill a matching bolt pattern for less than $50 in many areas. The result will not look factory, but it works. Use 16-gauge aluminum or 18-gauge stainless for adequate rigidity.
Step-by-step: safe removal and installation
- Fully close the propane cylinder valve and disconnect the regulator. Do not skip this step — every OEM manual I have seen (Hampton Bay and Fire Sense included) makes this an explicit safety requirement before any service to the head assembly.
- Allow the heater to cool completely. The reflector and emitter screen hold heat longer than you expect. Wait at least 30 minutes after the last use.
- Remove the existing wing nuts, washers, and any remaining fasteners from the reflector studs. Keep all hardware in a small container — you may need to reuse it. Hampton Bay's hardware list references M6x10, M6x22, and M8x16 fasteners, so photograph or note what comes off your specific unit.
- Lift the old reflector straight up and off the chimney tube and studs. On multi-panel designs (Fire Sense style), remove the center cap first, then slide each panel off the studs outward.
- Clean the reflector studs and emitter screen area. Check the studs for thread damage. If studs are stripped or bent, replace them before fitting the new reflector.
- If using an aftermarket reflector, dry-fit it first without fasteners to verify the center hole clears the chimney and all mounting holes align. If holes do not align, use the BCD measurement and a step drill to carefully open holes to the correct position — do not force the reflector onto misaligned studs.
- Place the new reflector over the chimney and studs. Install washers then wing nuts. Tighten wing nuts firmly by hand — snug is the goal, not power-torqued. OEM instructions do not specify torque values and direct hand-tightening only.
- Reconnect the regulator, tighten the coupling nut by hand, and perform a leak test with soapy water before lighting. Look for bubbles at every gas connection point. If any appear, do not light the heater — tighten and retest.
Brand-specific things to check before ordering
Most consumer standing heaters share similar architecture, but there are real differences across brands that affect what replacement part you need and whether any adapter work is required. The guidance here focuses on verified differences to check, not claimed proprietary specs.
Fire Sense
Fire Sense heaters typically use the multi-panel reflector design: separate outer panels plus a center cap, all mounted to 3 or 4 studs on the emitter head. This means replacement reflectors are sold as assembly kits rather than single-piece domes. Fire Sense reseller SKUs like 61956 (32-inch round) and 61437-compatible listings (38-inch) are designed as direct-fit upgrades for specific Fire Sense model families. Before ordering, confirm whether your model uses the 3-barrel-bolt design and check the stud spacing against the listing. Because Fire Sense is also sold under related branding (including hammer-tone bronze finish variants), the finish type is worth noting, a standard chrome reflector on a hammer-tone heater body looks mismatched.
Hampton Bay
Hampton Bay uses a one-piece dome design on most standing models (like the PH01 series). The reflector drops over the chimney post and secures to 3 studs with washers and wing nuts, labeled FF, GG, and HH in the assembly manual. The manual also notes a protective film on new reflector pieces that must be removed before first use, something that often gets skipped and causes cosmetic damage from heat-baked-on plastic. Hampton Bay's standard advice for replacement parts is to contact their customer service directly. The PH01 uses M6 and M8 metric fasteners, so verify your stud size before ordering hardware separately.
Paramount tabletop heaters
Paramount tabletop patio heaters use a compact reflector that is proportionally smaller than full-size standing units. The mounting bracket system on tabletop heaters often differs from standing models, so do not assume a universal 33-inch dome will work, it almost certainly will not. Many replacement reflectors and small tabletop models are available in a hammer tone bronze finish table top patio heater style that resists scratches and helps mask wear. Measure your existing reflector OD carefully (many tabletop units use a 12-inch to 18-inch top shield) and look for listings that specifically call out tabletop or small-form compatibility.
AZ Patio Heaters (including tabletop fire pit models)
AZ Patio Heaters produces both standing propane heaters and tabletop fire pit models, including round tile-top configurations. For their standing heaters, the 3-stud dome mount is common and many universal 33-inch reflectors are listed as compatible. For the round tile-top fire pit style, the 'top shield' concept is different, the tile surround or decorative top functions as the heat-deflecting element rather than a dome above a burner. If you are trying to replace a component on one of the AZ round tile-top fire pit models, look for the specific tile assembly or surround ring rather than a dome reflector.
Maintenance and common problems
Rust around the mounting holes is the most common maintenance issue, and it nearly always starts where the coating has chipped during installation. Touch up those spots immediately with high-temperature paint rated for at least 1200°F. Do not use standard spray paint, it will burn off and accelerate corrosion.
Warping happens when a reflector is exposed to high heat repeatedly without adequate ventilation, or when a solid-dome aftermarket piece replaces a vented original. If your reflector is warping, first check whether the original had vent holes that the replacement lacks. Minor warping on aluminum pieces can sometimes be gently pressed flat when cold, but a significantly warped reflector should be replaced, it will no longer direct heat correctly and can create hot spots.
Loose wing nuts are worth checking seasonally. Thermal cycling (heat expansion and contraction) gradually backs off hand-tightened fasteners. A quick check at the start of each outdoor season takes 30 seconds and prevents the reflector from shifting or rattling during use.
What you should expect to pay
Universal 33-inch aluminum aftermarket domes run from about $30 to $90 depending on material quality and brand reputation. The Home Depot 17.5 x 17.5 inch square aluminum shield (for tabletop and pyramid heaters) is listed at $84.04. OEM branded reflector assemblies for specific Fire Sense or Hiland-type models tend to be priced at the higher end, particularly for 38-inch one-piece premium versions. Used OEM pieces on eBay and salvage sellers often fall in the $20 to $50 range for common sizes but shipping on large-diameter metal pieces is not cheap, so factor that in.
Final buying checklist
Before you place an order, run through this list. It takes five minutes and prevents a frustrating return.
- Measure outer diameter of your existing reflector or heater head (in inches).
- Measure the center-hole inside diameter.
- Count mounting holes and measure the bolt-circle diameter (BCD).
- Measure individual hole diameters and identify stud thread size (M6 or M8 on most consumer models).
- Confirm mounting type: one-piece dome, multi-panel kit, or square bracket-mount.
- Note whether original had ventilation slots — match this feature in the replacement.
- Choose material based on climate: stainless steel for coastal or high-humidity, aluminum for inland or budget-conscious, powder-coat or hammer-tone steel for covered patios where finish match matters.
- Check seller notes for any stated drilling or modification requirements before assuming universal fit.
- Verify hardware is included or order replacement wing nuts, washers, and bolts separately if studs are worn.
- Decide: OEM for guaranteed fit (best if under 3 years old and parts are available), aftermarket universal for cost savings on verified measurements, or salvage OEM for discontinued models.
FAQ
What is a top shield/reflector and why is it important on a propane patio heater or tabletop fire pit?
The top shield (reflector) is the metal dome or flat cap above the burner that directs heat downward, protects the burner from weather, and completes the heater’s safety assembly. Operating without a properly fitted reflector reduces heat efficiency, can expose hot components, and may create unsafe combustion conditions. OEM manuals repeatedly instruct not to operate the heater unless the reflector/head assembly is fully and correctly installed.
How do I identify whether I need an exact OEM replacement or a universal/aftermarket reflector?
Check your heater’s model number and the OEM parts list first. If the manufacturer offers a direct-fit replacement with the same size, hole pattern and finish, that’s usually the simplest option. Choose universal/aftermarket reflectors only if you can match the key measurements (diameter, center hole, bolt pattern) or if you are willing to perform minor hole rework or use adapter hardware. Consider availability, cost, and finish: OEMs are model-specific and often cost more but guarantee fit; aftermarket universals are cheaper but may require modification.
What measurements and details do I need to determine compatibility?
Measure and record: 1) Outer diameter (OD) of the reflector; 2) Center/chimney hole inner diameter (ID); 3) Number of mounting holes or studs; 4) Bolt-circle diameter (BCD) or center-to-center distances between mounting holes; 5) Each mounting-hole diameter; 6) Reflector thickness; 7) Any required spacer/standoff length; 8) Finish type (stainless, aluminum, powder-coated). Use digital calipers for hole IDs and a tape measure for OD. If holes are on an odd pattern, measure adjacent chord lengths and compute BCD or use an online bolt-circle calculator.
How do I measure bolt‑circle diameter (BCD) if the pattern is 3 or 4 holes?
For 3-hole patterns, measure the center-to-center distance between any two adjacent holes (chord length) and use a bolt-circle calculator or formula to get BCD. For 4-hole or even patterns, measure opposite hole center-to-center distance directly; that equals the BCD for pairs across the circle. If unsure, photograph the top with a ruler in-frame and use the photo plus dimensions when ordering.
What common mounting methods should I expect and how do they affect replacement choice?
Common methods: 1) Multi-panel reflectors with a center cap that fit over a chimney and attach to reflector studs (often 3–4 studs); 2) One-piece domes with 3-stud or 4-stud bolt patterns; 3) Square or 4-sided tops attaching to a bracket. Each requires matching the stud count and spacing; panel-style assemblies may allow partial replacement (single panel or center cap), while one-piece domes need exact BCD and hole sizes for direct-fit replacements.
What are the material and finish options and the trade-offs?
Stainless steel: best corrosion resistance, long life, higher cost; good in coastal or wet climates. Aluminum: lightweight, good thermal reflectivity, moderate corrosion resistance if anodized; usually lower cost. Powder-coated/hammer-tone steel: cost-effective and attractive finishes but can rust over time if the coating chips—better for covered or dry locations. Choose stainless for durability, aluminum for weight and cost balance, and powder-coated steel when appearance and cost are priorities but expect maintenance.